
Flowering plants always make your garden look more exciting (and can stop neighbors in their tracks). Perennials can dazzle year after year, while annuals can add quick blooms almost instantly. You can start with seeds or pick up transplants at the garden center, but once you've chosen your plants, there are a few basic steps to take to get your flowers off to a good start in your yard. Before you start digging, make sure to read the tag that comes with your plants or the instructions on your packets of seeds so you can match the plants' needs with the best spots to grow them. Then, if you already have established flower beds, you can easily place new annuals or perennials wherever you need to fill in some holes. Or you can always create a new flower bed to fill with all the beautiful blooms you want to grow.
Step 1: Right Place, Right Plant
Do the plants you've picked out like sun, shade, or a combination of both? Start by arranging your plants so they're in a spot where they'll get the kind of light they prefer (plants that like the sun should be out in the open, plants that need shade should go in a spot where they'll have some cover). Full sun is six hours or more of direct sun per day, not necessarily continuously. Part shade typically means four to six hours of sun per day. Shade definitions vary, depending on how deep the shade really is. Dappled shade gives a lot more light than deep shade, for example.
Step 2: Dig the Soil
Beautiful flower gardens start with good soil. In general, most flowering plants do best in soil that's loose and well-drained with a lot of organic material in it. You don't need to dig a large area to plant flowers, but you should dig enough soil that you can add some compost in to improve the soil structure and add nutrients.
Avoid digging or handling soil when it's wet to prevent compaction. Plants need a certain amount of space between soil particles for roots to grow. One test to see if soil can be worked is to dig a small sample of soil from a 3-inch hole. Squeeze it into a ball, then toss the soil onto a hard surface such as a rock or pavement. If the soil stays together, it's too wet for planting, but if it shatters, it's time to plant.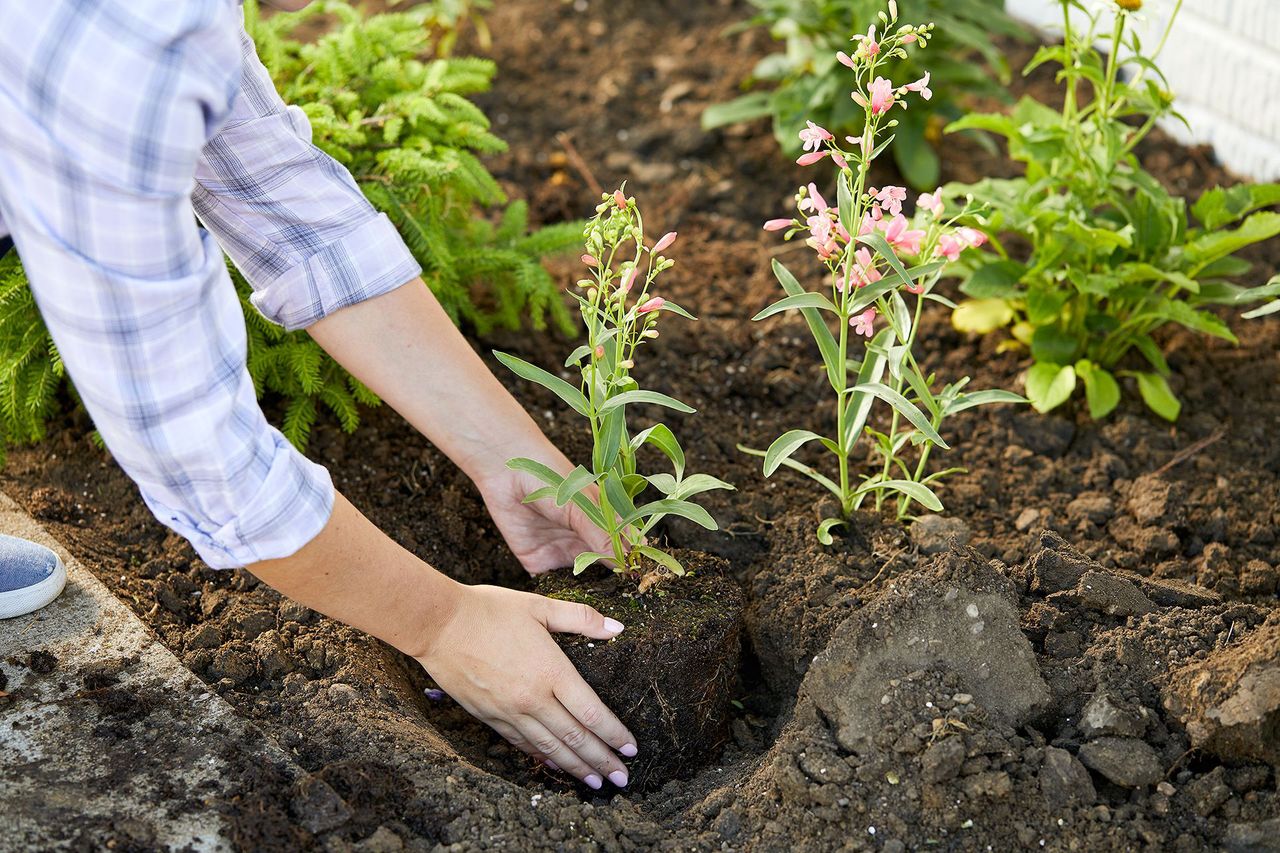
Step 3: Plant Your New Flowers
The steps for how to plant flower seeds are a little different than plants from the nursery, so follow the directions on the seed packet to know how deep to plant each seed and how far apart. With potted garden plants, you should usually plant with the soil at the same level as the soil in the pot, but read the plant tag to be sure. Some flowering plants, like irises and peonies, prefer their rhizomes and roots to be planted very shallow. When removing the plant from the pot, gently tease some or all of the soil from the roots and place the plant into the hole you've prepared. Push the soil back into the hole, firming it gently so you put the soil back but don't compact it entirely.
Step 4: Water Deeply and Add Mulch
Thoroughly soak the soil around your newly planted flowers. Garden flowers generally need 1 to 2 inches of moisture every week to perform well, so water if you don't receive enough rain. It's best to water deeply and less frequently than shallowly and more often so the roots of the plants grow deeper. Avoid keeping soil waterlogged or the roots of your flowering plants may rot. A layer of mulch like shredded bark around your new plants will help slow down evaporation and reduce how often you need to water.
Step 5: Deadhead and Groom Your Flowers
As your flowering plants begin blooming, feel free to cut them for bouquets. Clip off the spent flower heads to encourage the plant to put more energy into its foliage and winter survival. Some flowers, including zinnias, dahlias, and others, bloom again when you remove the blooms. Clip or pull any brown foliage for a cleaner look. Daylilies in particular benefit from the removal of old leaves.


![A Tranquil Jungle House That Incorporates Japanese Ethos [Video]](https://asean2.ainewslabs.com/images/22/08/b-2ennetkmmnn_t.jpg)


