
When it comes to your living room furniture, think outside the box. This DIY coffee table features an asymmetrical design that leaves room for ottomans underneath. Simply slide them out when extra seating is needed. Learn how to make this coffee table, below, for a creative living room refresh.
How to Make a Coffee Table
Playing with the shapes of furniture can land you with a seriously cool piece. See how we made this unique table below.
Supplies Needed
* 3/4-inch thick 4 x 8-foot sheet of plywood (we used white oak)
* Measuring tape
* Pencil
* Jigsaw
* Clamps
* Drill
* 1-1/2-inch screws
* 1-1/4-inch screws
* Wood glue
* Iron-on veneer
* Iron
* Clean finish
* Paintbrush
Cut List
* Under Layer Top: 3/4 x 19-3/4 x 38-inch
* Under Layer Sides: (2) 3/4 x 19 x 18-inch
* Under Layer End: 3/4 x 13 x 18-inch
* Finish Layer Top: 3/4 x 21-1/4 x 38-3/4-inch
* Finish Layer Sides: (2) 3/4 x 19 x 18-3/4-inch
* inish Layer End: 3/4 x 13 x 18-3/4-inch
Step-by-Step Instructions
This coffee table will be the talking point of your living room. Learn how to assemble it, below.
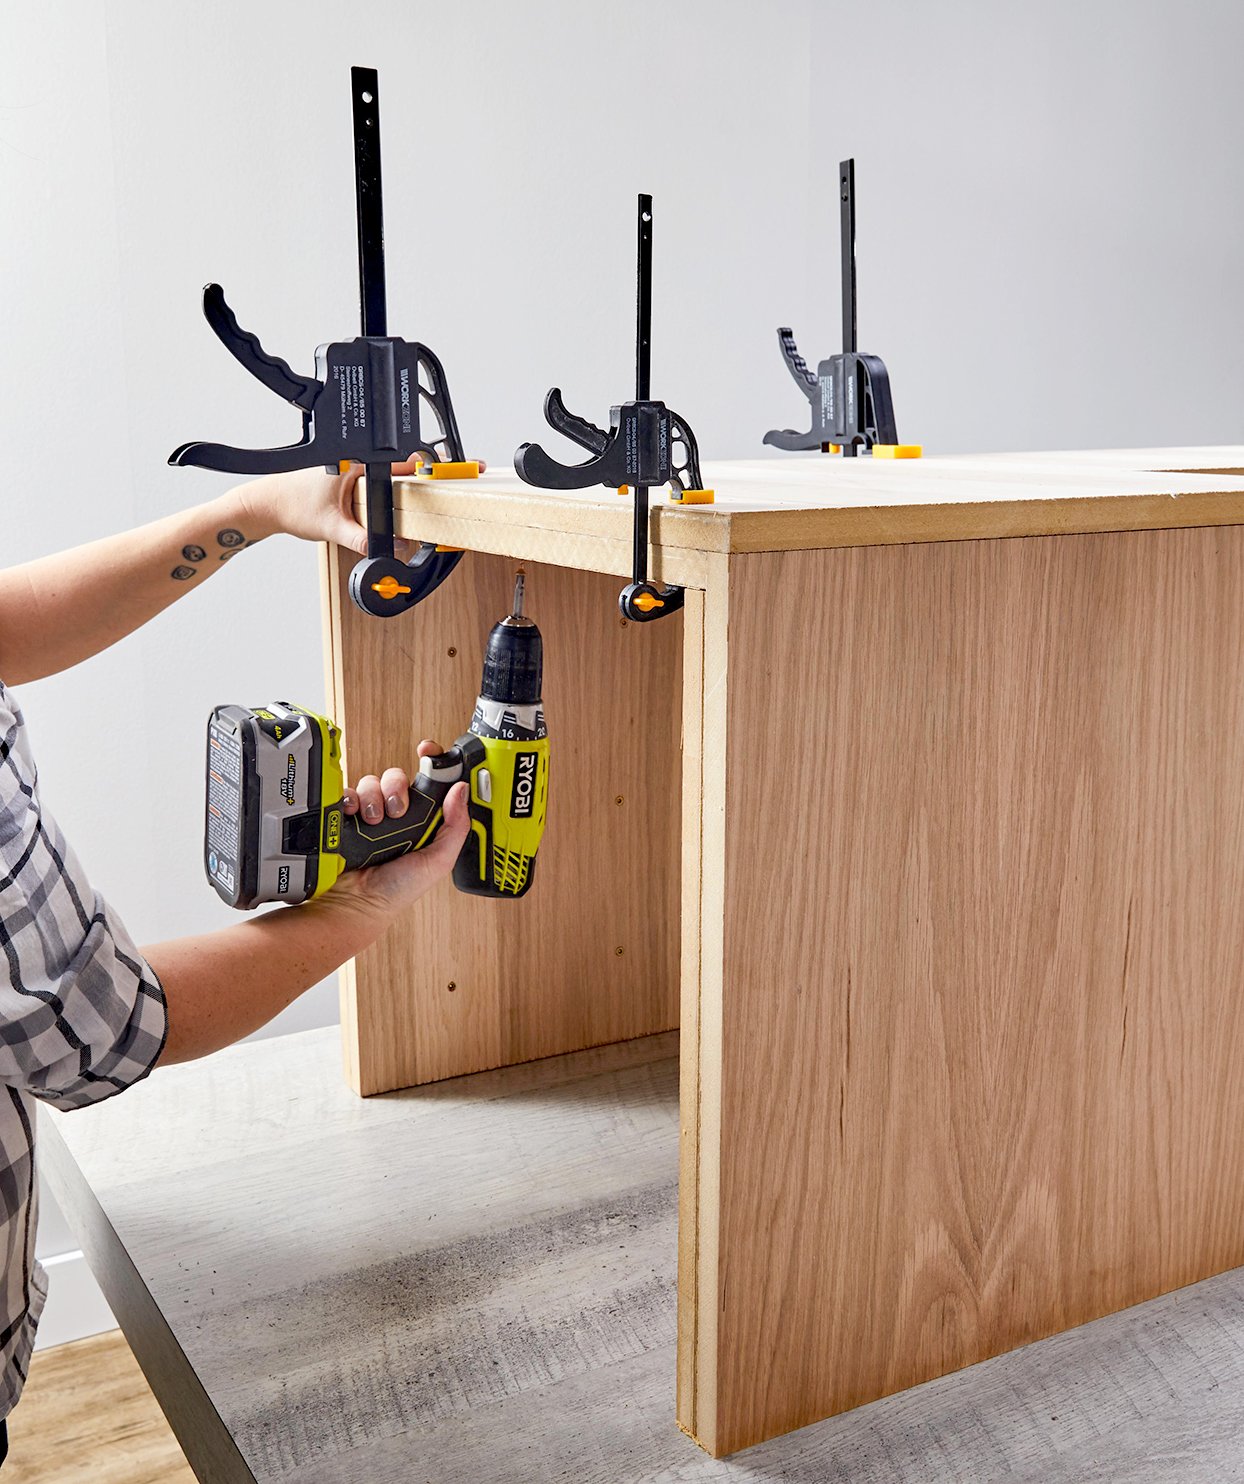
Step 1: Cut Notch
At the bottom right corner of your 19 x 38-inch under layer top piece, measure in 3/4-inch and up 19 inches. Clamp the board to a work table and cut this section out with a jigsaw.
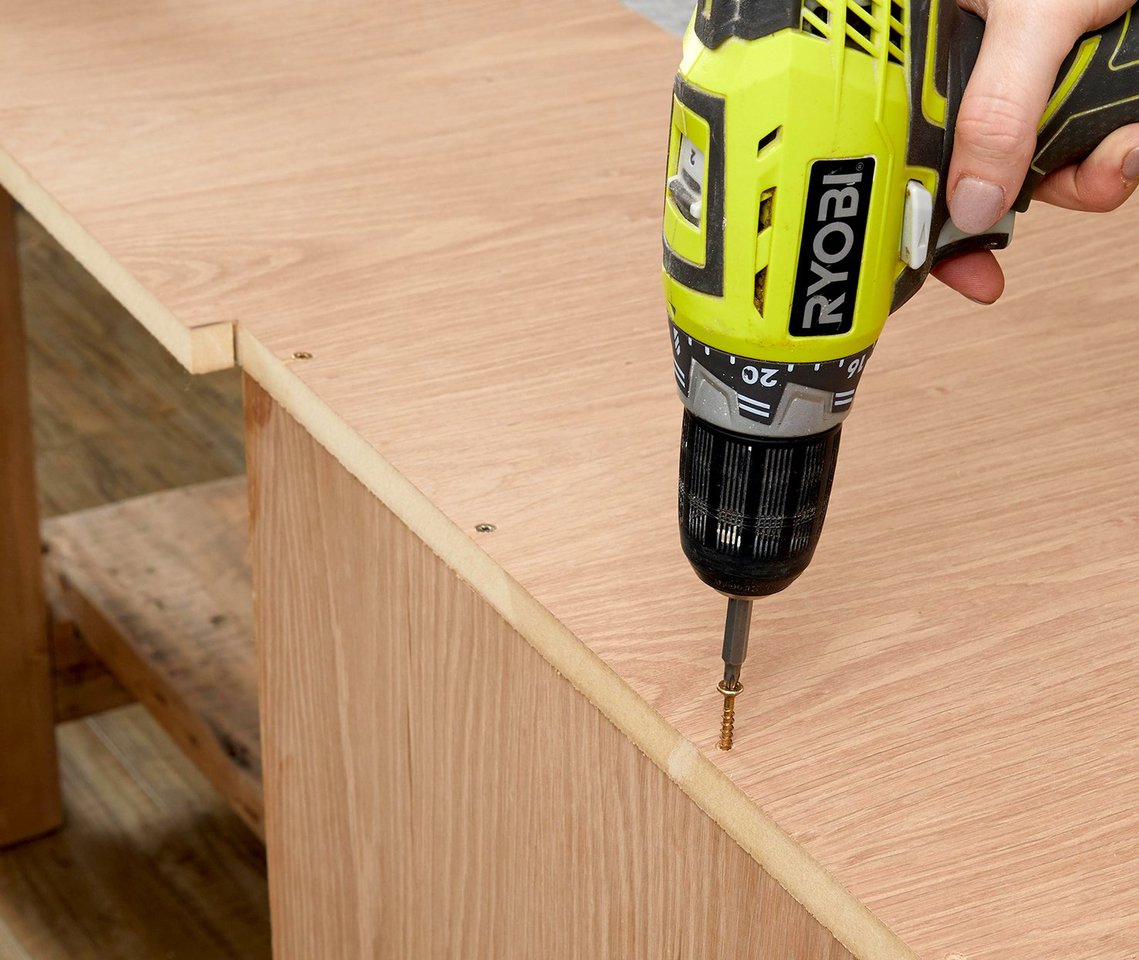
Step 2: Attach First Side
Align the 19-inch edge of one of the under-layer side pieces underneath the cut you just made and hold in place with a corner clamp. The two boards should be perpendicular to each other. Once the pieces are lined up and clamped, drill down from the top under layer board into the side piece using 1-1/2-inch wood screws.
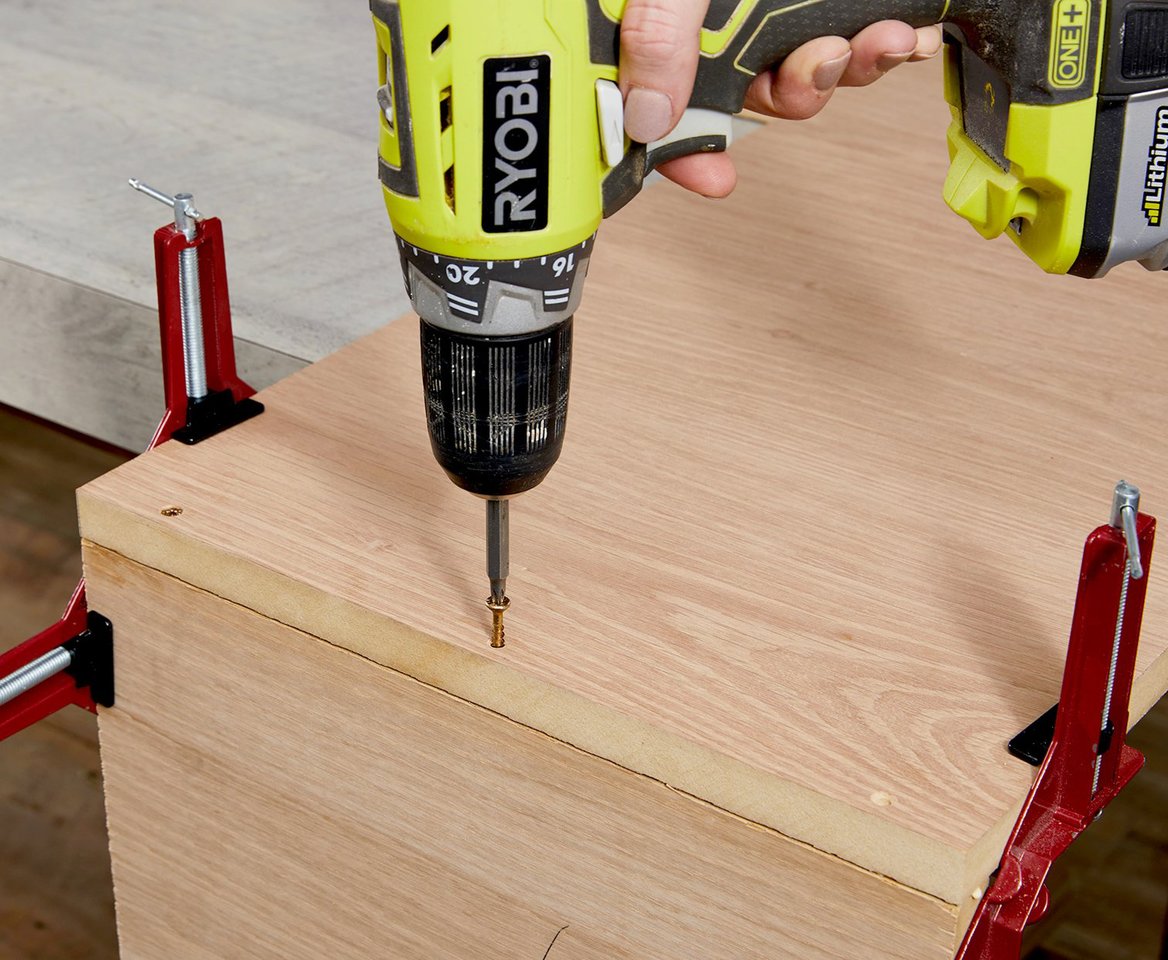
Step 3: Attach End Piece
Align the 13-inch edge of the end piece along the adjacent corner from where you just attached the first side piece. Clamp in place with a corner clamp and secure with screws in the same manner as step 2.
Step 4: Attach Second Side
With one side piece and one end piece attached, flip the table so the top is on the workspace. Using a corner clamp, attach the 19-inch edge of the last side on the other long end of the tabletop. It should be directly across from the initial side piece you installed. Drill to secure.
Mark a rectangle in line with the end of your 13-inch wide panel and the opposite 19-inch wide panel. Cut out using a jigsaw.
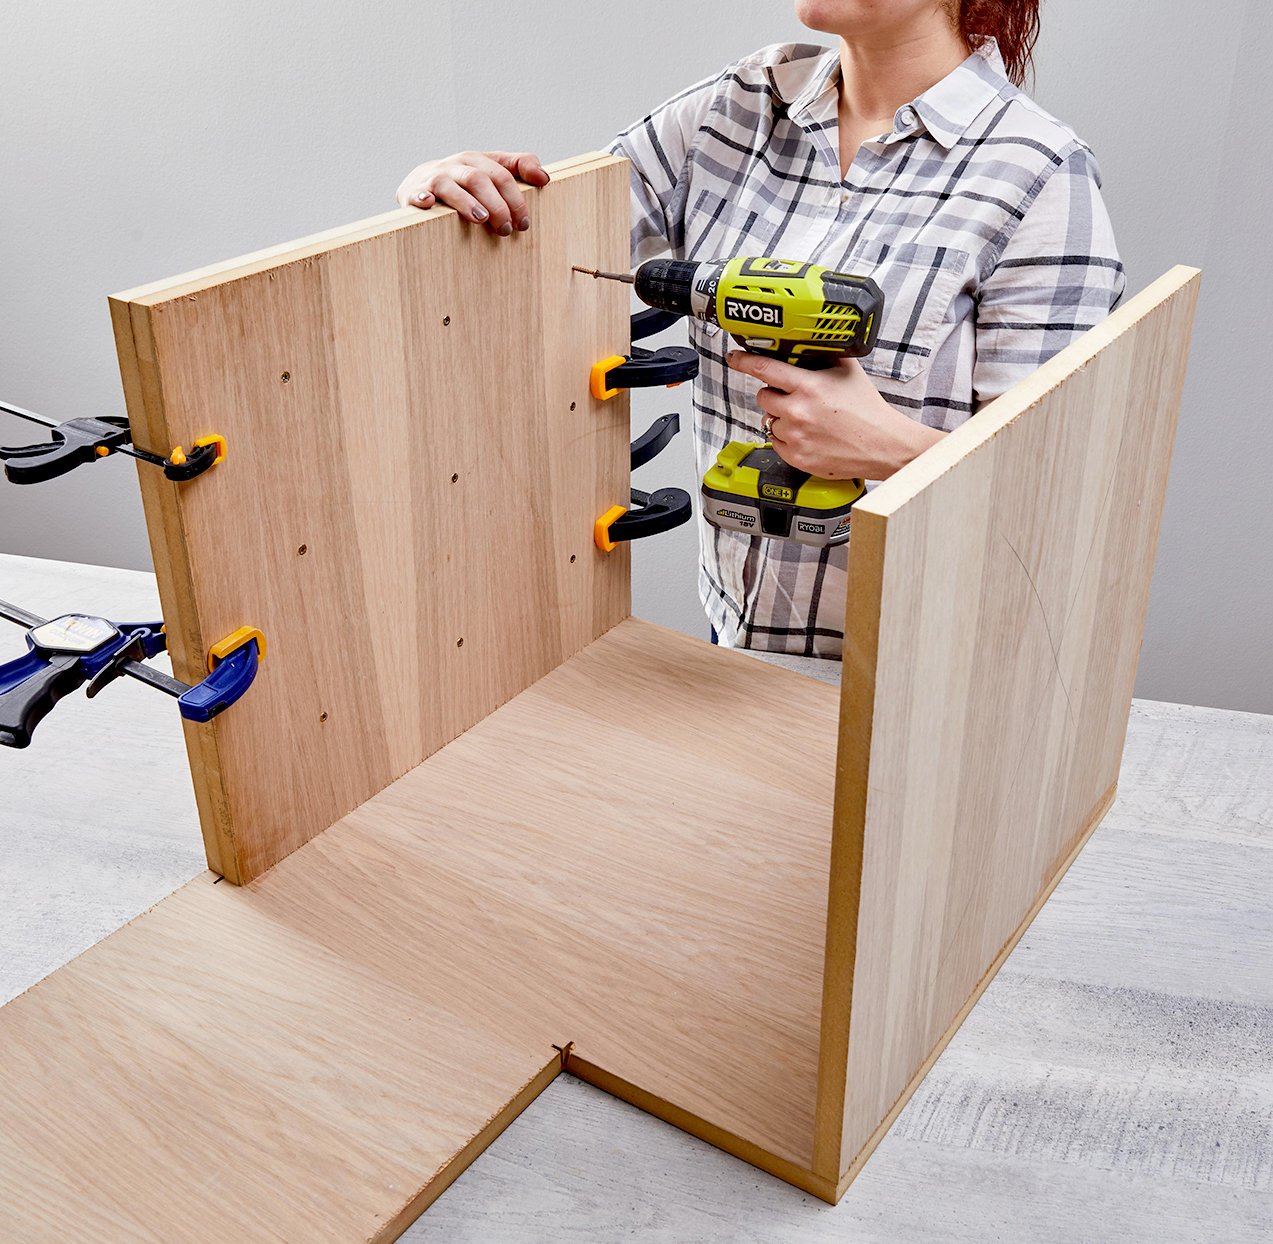
Step 5: Attach Outer Layer
Once you have the under-layer of the table assembled, apply wood glue to the face of one of the 19 x 18-3/4-inch sides. With glue applied, clamp the 19-inch sides of the under-layer and the finish layer together. Using 1-1/4-inch wood screws, drill three columns of three screws from underneath the table to secure the two sides together. Repeat this process on the remaining side and end piece.
Step 6: Attach Table Top
After the glue has dried, use a power sander to sand down any rough edges on the top. Place glue on the underside of the 20-1/2 x 38-3/4-inch tabletop and align it on the top of the assembled table, securing in the same fashion as the sides.
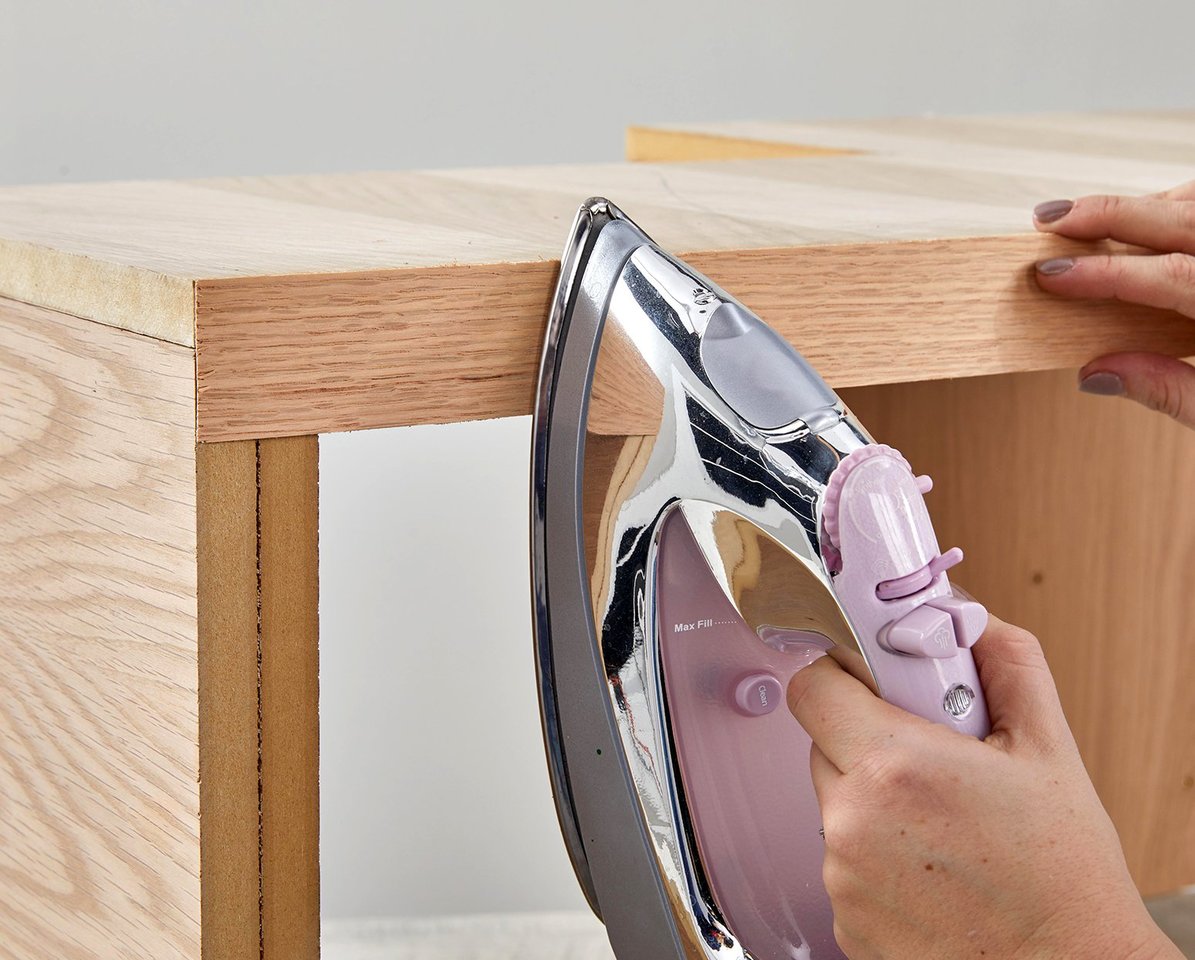
Step 7: Apply Veneer Sides and Finish
Once the glue has dried, sand down any rough edges on the sides and wipe clean. Cut the iron-on veneer to size and apply per manufacturer’s instructions. Apply a clear coat to the surface and sides of the table and let dry.


![A Tranquil Jungle House That Incorporates Japanese Ethos [Video]](https://asean2.ainewslabs.com/images/22/08/b-2ennetkmmnn_t.jpg)


