The best part? If messy pumpkin carving isn’t your thing, you don’t even need a carving kit to bring these adorable fall crafts to life. Give your good-old-jack a jill-o-lantern, for starters, and craft no-carve couples pumpkins with simple plastic his and hers props. Or, bust out the paint, roll up your sleeves, and make gourd-geous replicas of your family’s faces with easy templates and a pretty pastel base.
And why limit your pumpkin faces to ones that are inspired by humans? Dress up your farmhouse with pumpkins designed to look like cows, piglets, and bunnies—all with the help of a few easy-to-find craft supplies. At the end of the day, if you’re still a stickler for a classic pumpkin decorating (it’s tradition, after all), we’ve got you covered with pumpkin faces that'll outshine all the others in the neighborhood.
1. Mummy Pumpkins
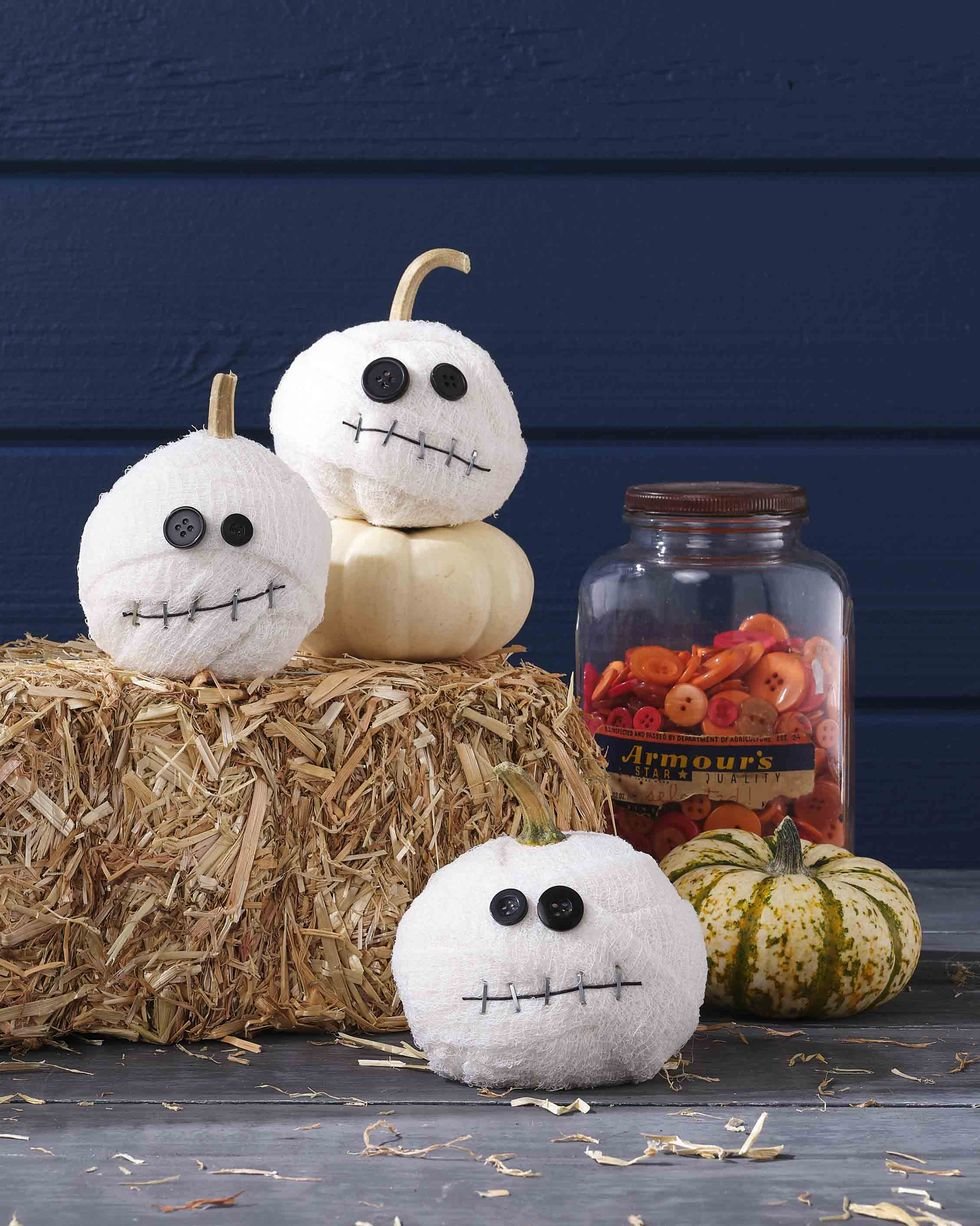
These mummies are just as cute as a button!
Make the pumpkin: Wrap a small white pumpkin with strips of gauze, holding strips in place where necessary with hot-glue. Attach two differently sized black buttons with hot-glue to create eyes. Tack down a length of thin black twine with staple-gun staples to create a mouth.
2. Moose Pumpkin
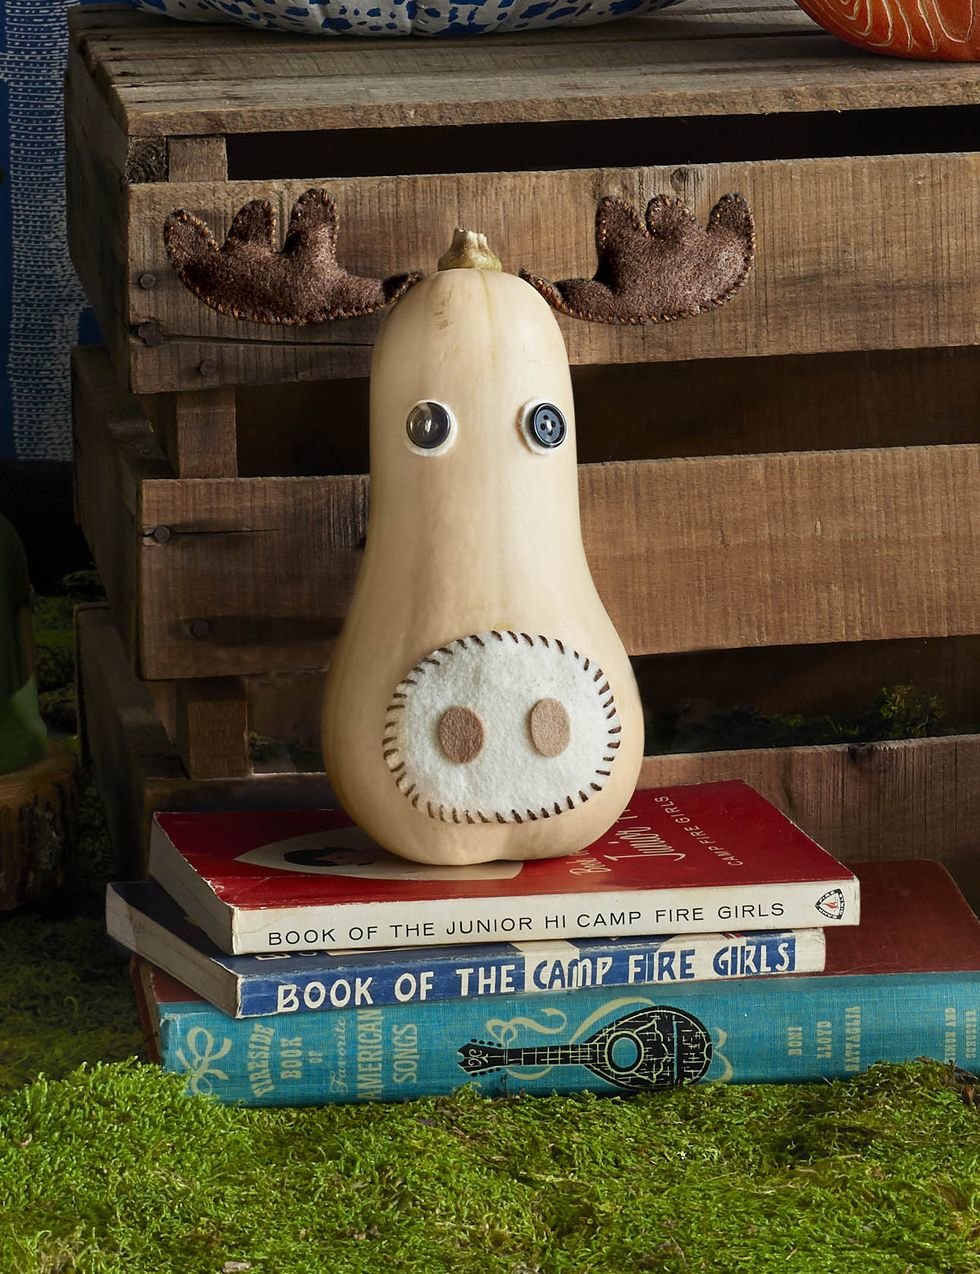
A little felt and a few buttons are all it takes to transform a plain ole' acorn squash into a friend moose!
Make the pumpkin: Cut out a piece of white felt, and hand-stitch a border using brown embroidery floss. Attach two small light brown felt circles to the white felt piece with hot-glue to create nostrils. Hot-glue white felt piece to lower portion of butternut squash. For each eye, sew a dark button to a slightly larger white felt circle (use white thread to mimic the pupil of the eye) and glue to squash as shown. Download our moose ear patterns. Pin patterns to brown felt, and cut out two of each template. Use brown embroidery floss to sew matching pieces together, leaving a small opening. Insert cotton stuffing and hand-stitch closed. Hot-glue ears to top of the squash.
3. Gnome Pumpkins
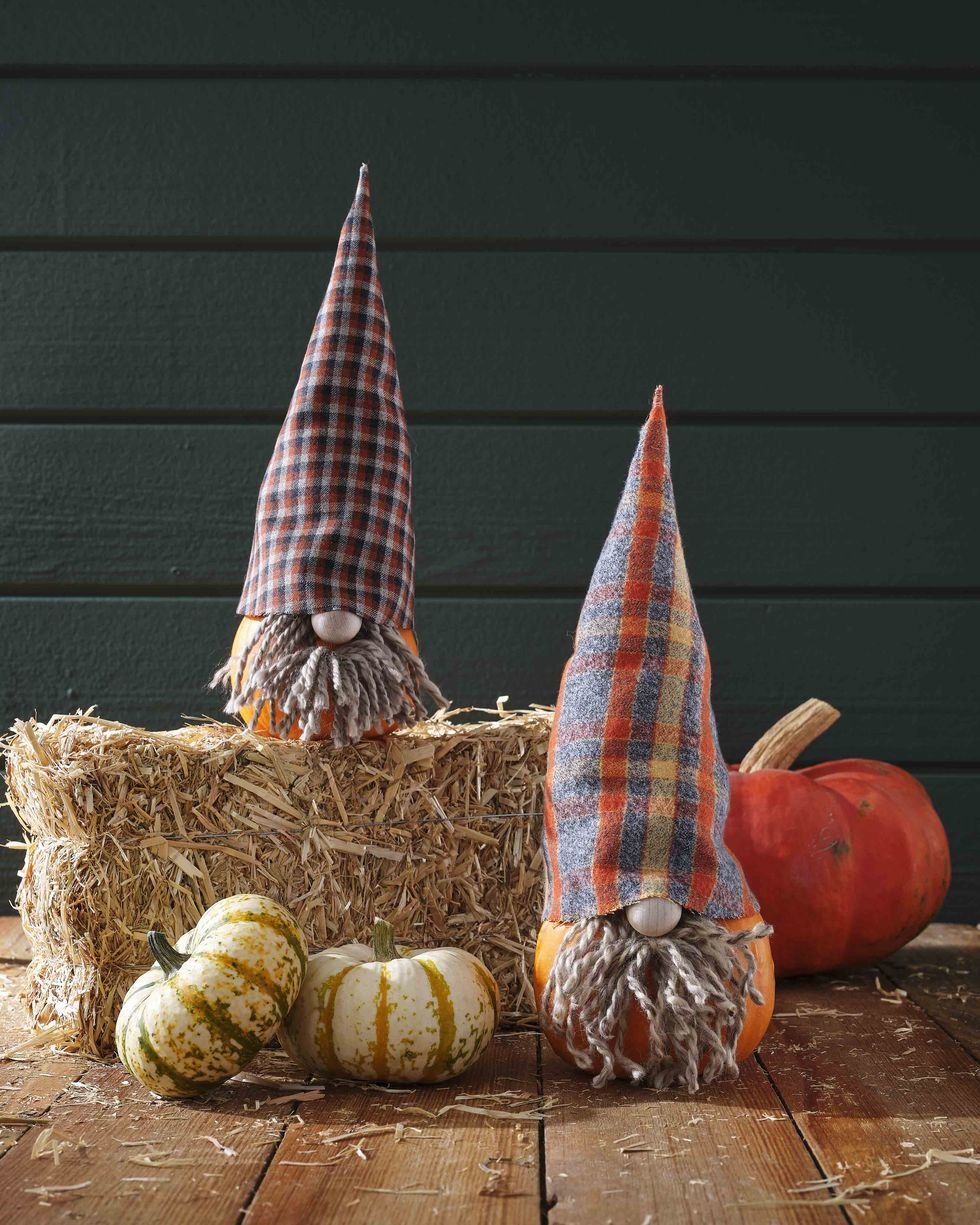
Keep those garden gnomes company with these warm and fuzzy pumpkin friends.
Make the pumpkin: Trace hat template on wool fabric, adjusting size as necessary; cut out. Use craft glue or iron-on fusible tape to glue straight edges together. Fill hat with batting to help it stand upright; set on pumpkin. Attach a small wood craft bead to a small pumpkin with hot-glue to create a nose. Attach strands of yarn with hot glue around nose to create beard; trim as necessary.
4. Owl Pumpkin
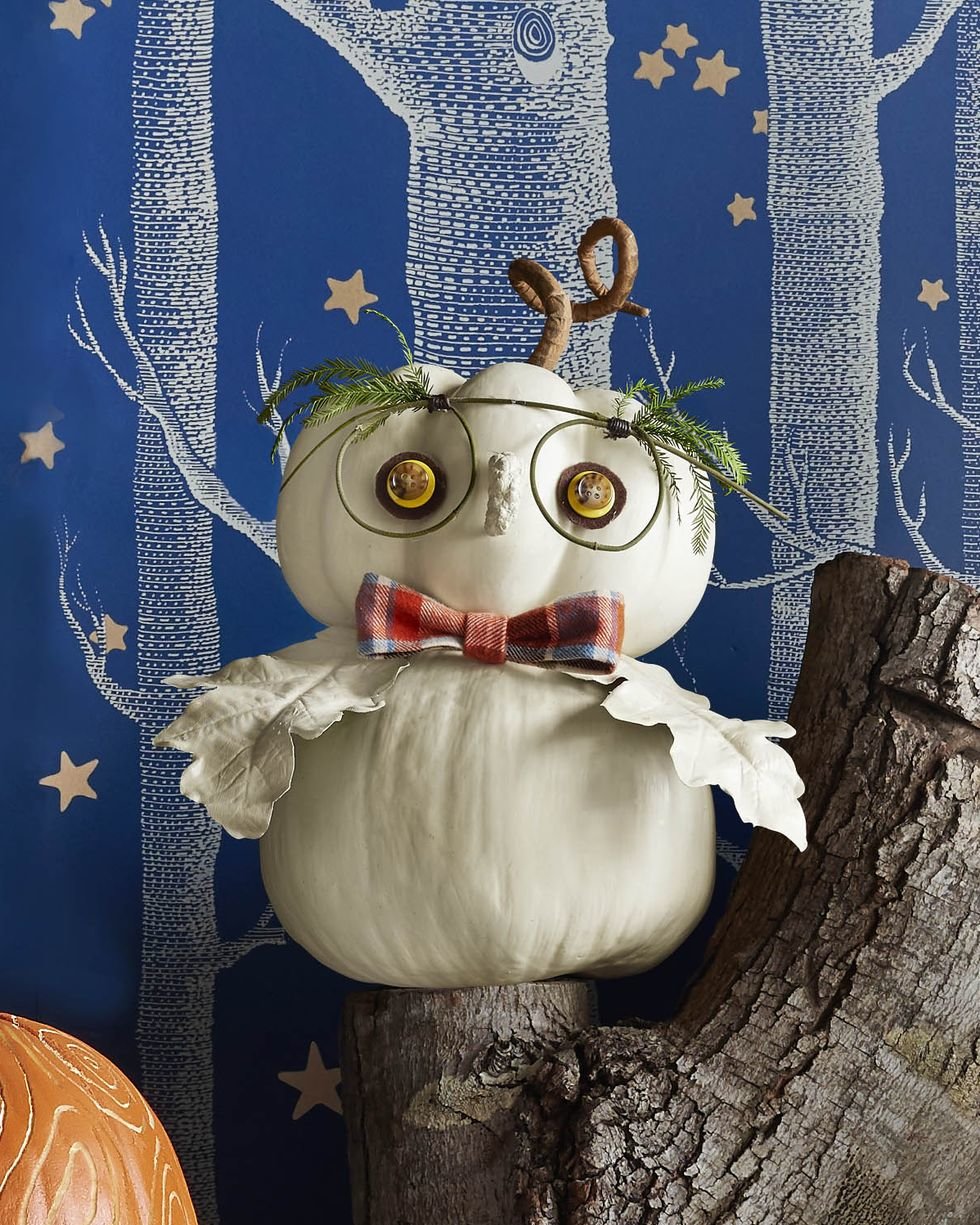
Look to nature for many of the materials needed to craft this wise fella.
Make the pumpkin: Hot-glue two white (lumina) pumpkins together to create the head and body. For each eye, cut out a small brown felt circle, then glue a slightly smaller yellow button on top, followed by an even smaller brown button. Hot-glue eyes to top pumpkin. Create loops from a thin twig and tie in place with wax twine to create eye-glasses shape. Hot-glue fir sprigs to glasses to create eyebrows. Spray-paint two oak leaves and a baby pinecone a similar color to pumpkin. Hot-glue leaves to pumpkin to create wings and pinecone to create a nose. Make a bow tie from plaid ribbon. Hot-glue to pumpkin.
5. Rickrack Pumpkin Face
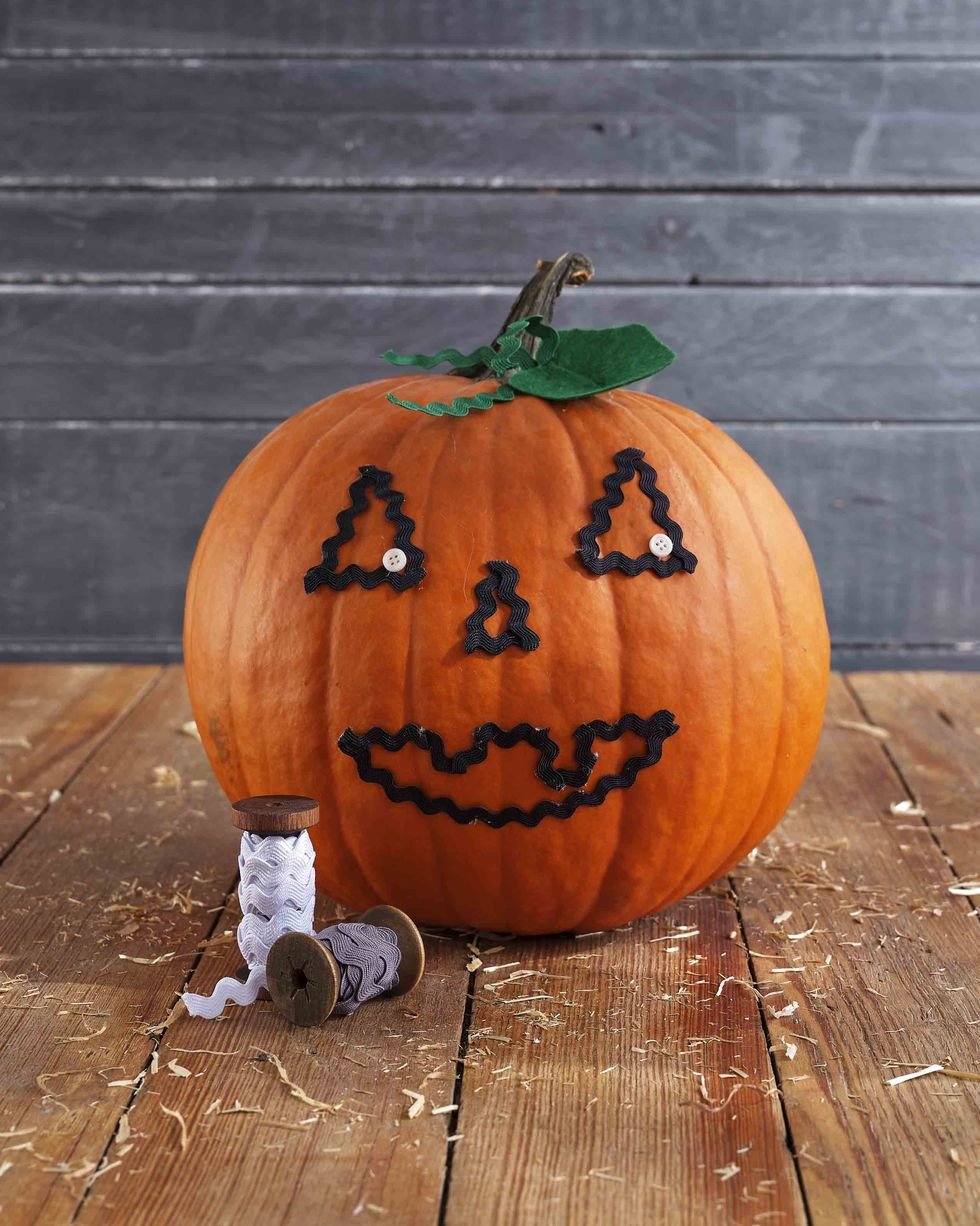
No carving necessary to create this sweet pumpkin face.
Make the pumpkin: Lightly draw a simple pumpkin face on a pumpkin. Use lengths of black rickrack to cover the drawing, attaching it with hot-glue. Attach small white buttons to the corner of each eye with hot-glue. Cut pumpkin-shaped leaves from green felt and lengths of green rickrack to create tendrils; attach at the base of the pumpkin stem with hot-glue.
6. Silhouette Pumpkins
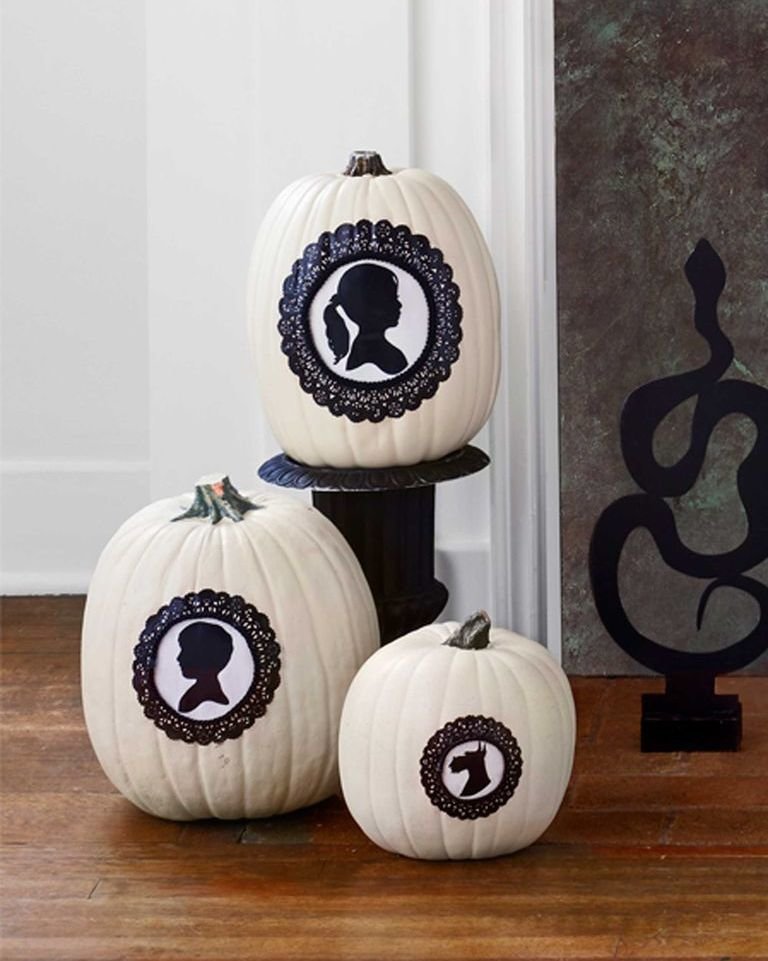
Memorialize your family and pets on this frilly, doily laced pumpkin.
Make the pumpkin: Photograph your subject from the side. Scale photo as needed, then cut out profile. Trace and cut profile from black craft paper. Using Mod Podge, adhere cutout to a white paper circle cut to fit interior of a black doily. Secure unit to pumpkin. Glue trim to edge of white paper.
7. Rickrack Frankenstein
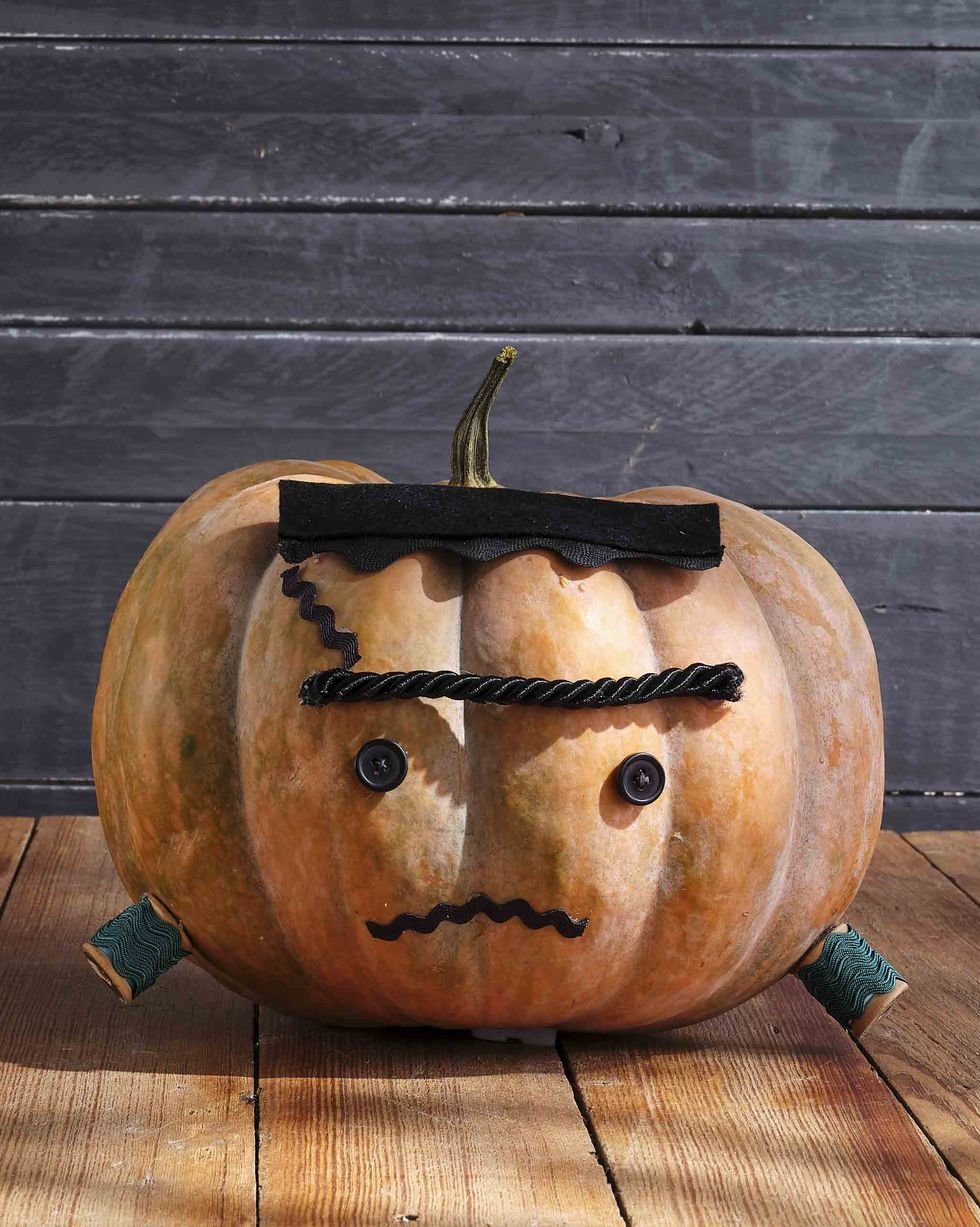
Is he friendly or is he not?!?! With rickrack spool bolts how could he be anything other than sweet and cuddly.
Make the pumpkin: Cut a length of extra-large black rickrack. Cut a piece of black felt the same length and attach it to the rickrack so that only the bottom “ruffles” are showing. Attach the top of a flat-shaped heirloom pumpkin for hair. Attach two small black buttons to the center of the pumpkin with hot-glue for eyes. Attach a length of thick black cording above the eyes with hot-glue for eyebrow. Attach lengths of medium-size black rickrack to pumpkin with hot-glue for scar and mouth. Wrap two wooden spools with green rickrack and attach to the bottom sides of pumpkin with hot-glue for bolts.
8. Bean Bag Toss Pumpkin Faces
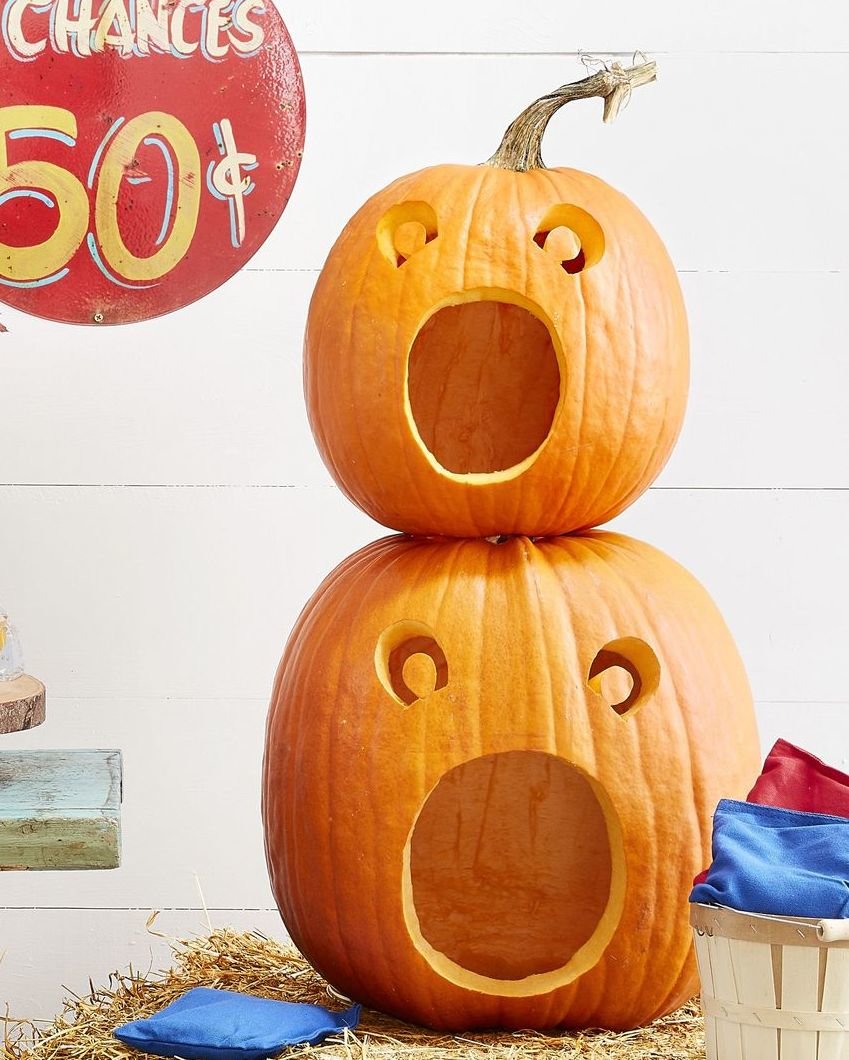
This creative idea doubles as a fun game you can play with your kids!
Make the pumpkins: Start by cutting large holes in the bottom of two pumpkins; scoop out the pulp and seeds. Download and trace the face template on the pumpkins, then cut out the faces. Stack the pumpkins and use skewers to help hold the top pumpkin in place. To play, toss beanbags into mouths—10 points for bottom, 20 points for top.
9. Fox Pumpkin Face
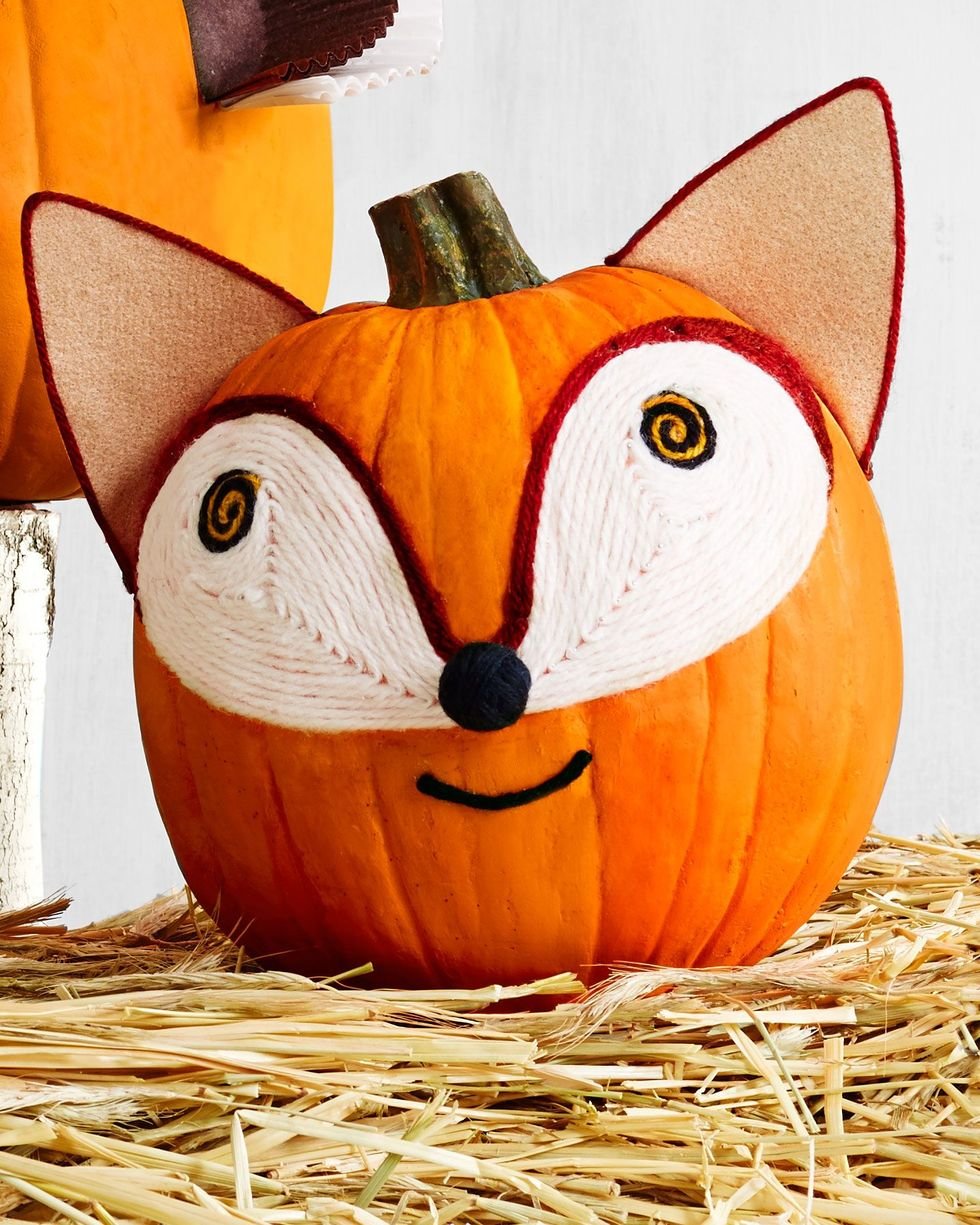
You don't need to be sly as a fox recreate this friendly fur critter.
Make the pumpkin: Using this image as a guide, outline the face silhouette with pencil first. For the pupils, hot-glue black and orange yarn in a spiral pattern directly onto the pumpkin. Hot-glue a continuous piece of white yarn in a teardop pattern until the space is fully filled. Outline the eyes with rust yarn, then add a black yarn mouth and pom-pom nose. For ears, glue felt on cover-weight paper backing. Cut into triangles, trim with rust yarn, and glue to the top of the pumpkin.
10. Mama Pig and Piglet Pumpkin Faces
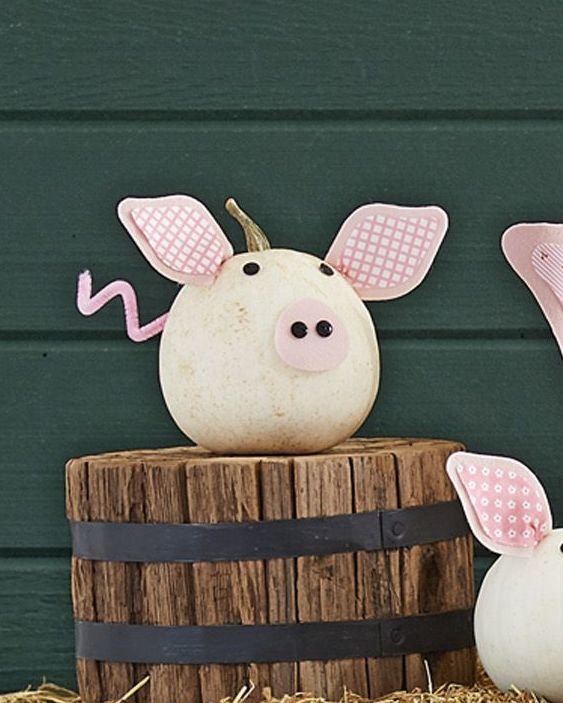
This adorable piglet is kind of a pig deal.
Make the pumpkin: Download and trace our ears and nose templates on pink felt, then cut out. For the inner ear pieces (they should be slightly smaller than the felt), cut from patterned pink craft paper. Use craft glue to attach the paper to the felt and hot-glue the ears and noses to the pumpkins. Next, paint two pumpkin seeds with black craft paint and hot-glue them for eyes for mama and small black buttons for mama’s nostrils and piglets’ eyes and nostrils. Finally, twist pink pipe cleaners in coils and hot-glue one to the back of each pumpkin as makeshift tails.
11. Cow Pumpkin Face
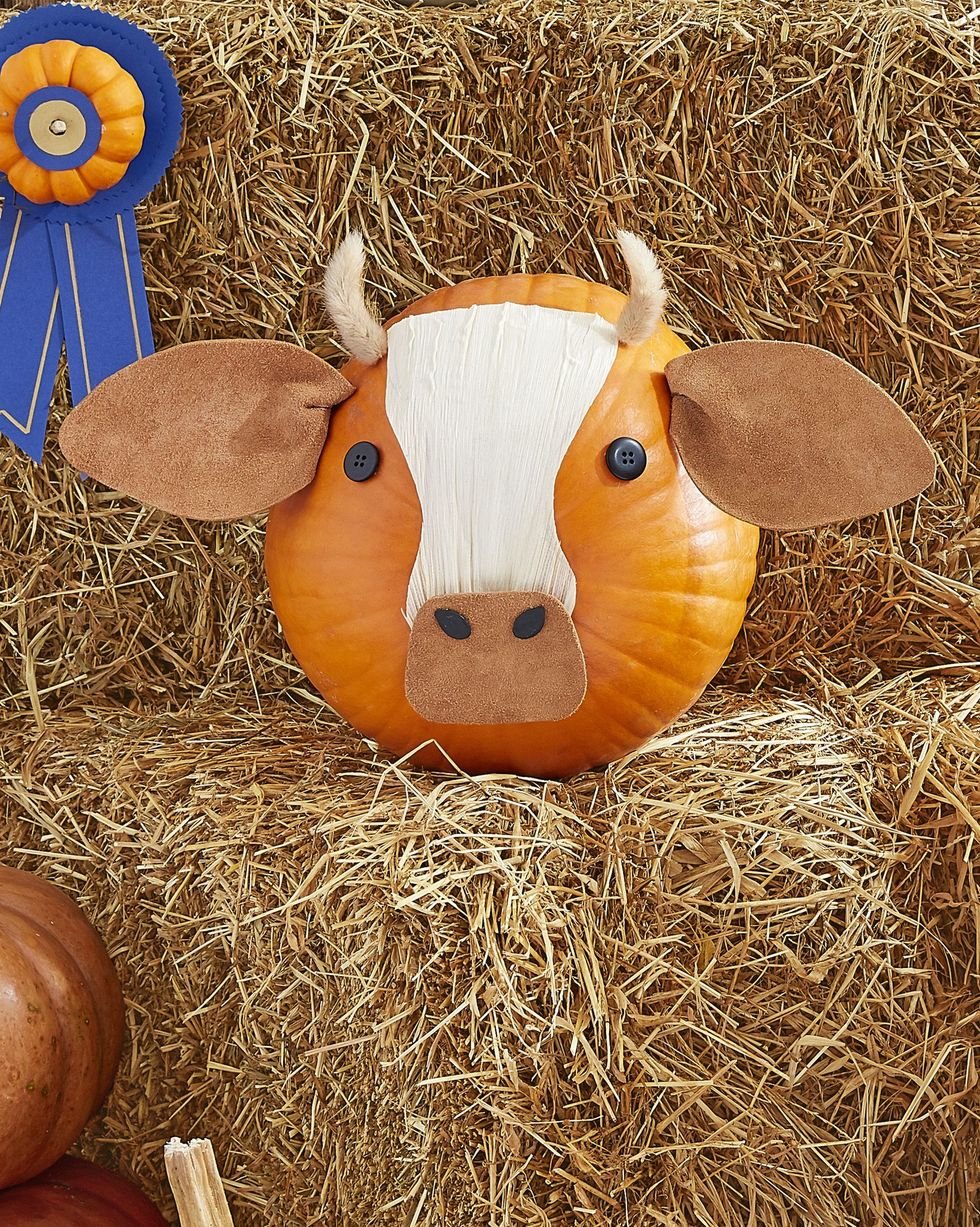
Moo-yah!
Make the pumpkin: Download our cow ear and nose templates and trace on brown leather, scaling up or down based on the size of your pumpkin; cut out. Download our forehead pattern and trace on a corn husk, scaling up or down as necessary; cut out. Hot-glue ears, nose, and forehead to the bottom of a pumpkin. For nostrils, paint two pumpkin seeds with black craft paint and attach with hot glue. Finally, paste black buttons for eyes and dried bunny tail grass tops for horns.
12. Owl Pumpkin Face
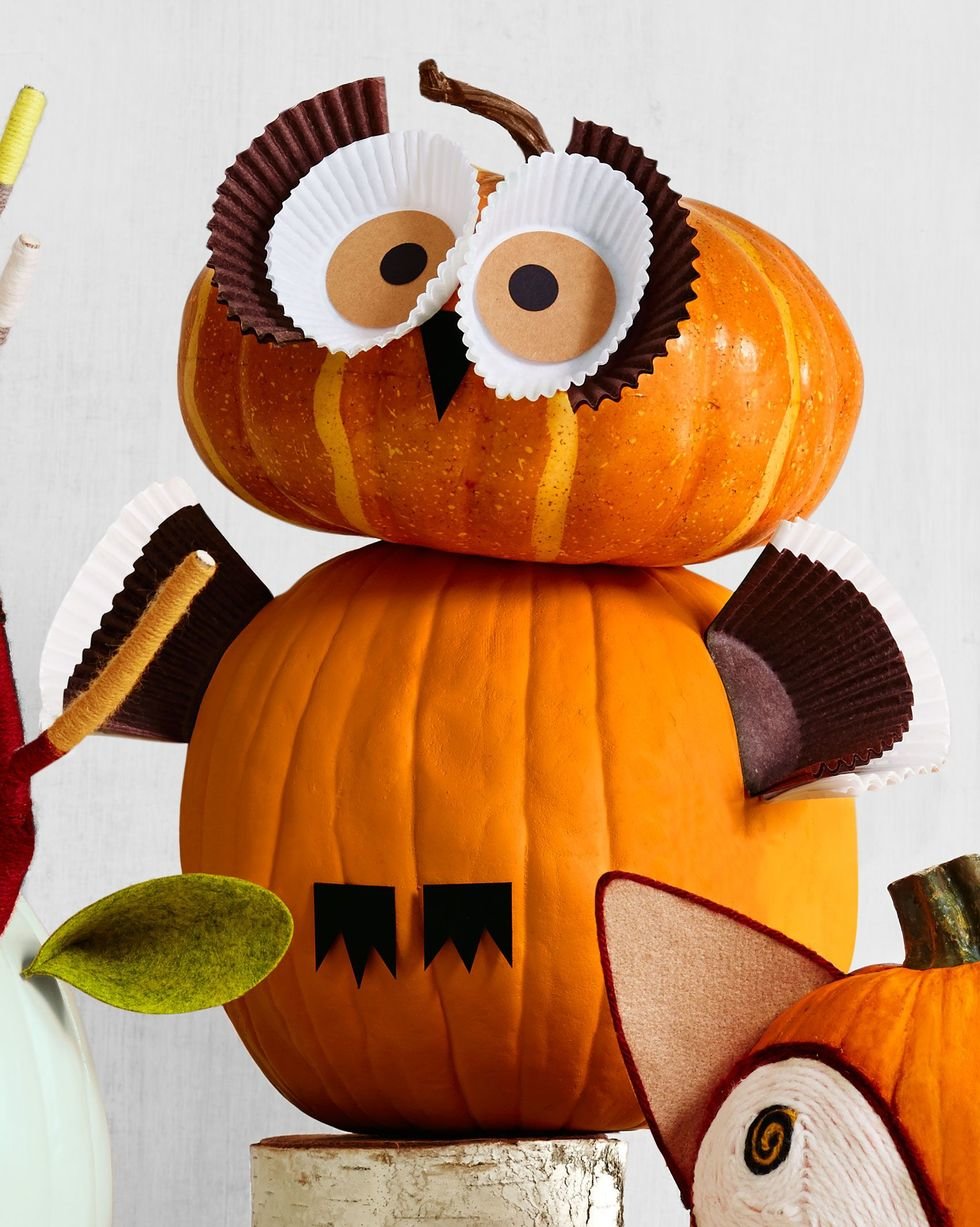
H00 could resist crafting this stacked owl?
Make the pumpkin: For the face, cut two circles (around the same circumference as a cupcake liner) on light brown paper and glue them to the bottom of two white liners. Cut out or draw two smaller black dots for the pupils. As for the lashes, cut a brown cupcake liner in half. Hot glue the eyes to the pumpkin.
For wings, cut a brown and a white liner in half and attach to the sides of bottom pumpkin. Cut a triangle beak and feet from black card stock and glue to the body.
13. Bunny Pumpkin Face
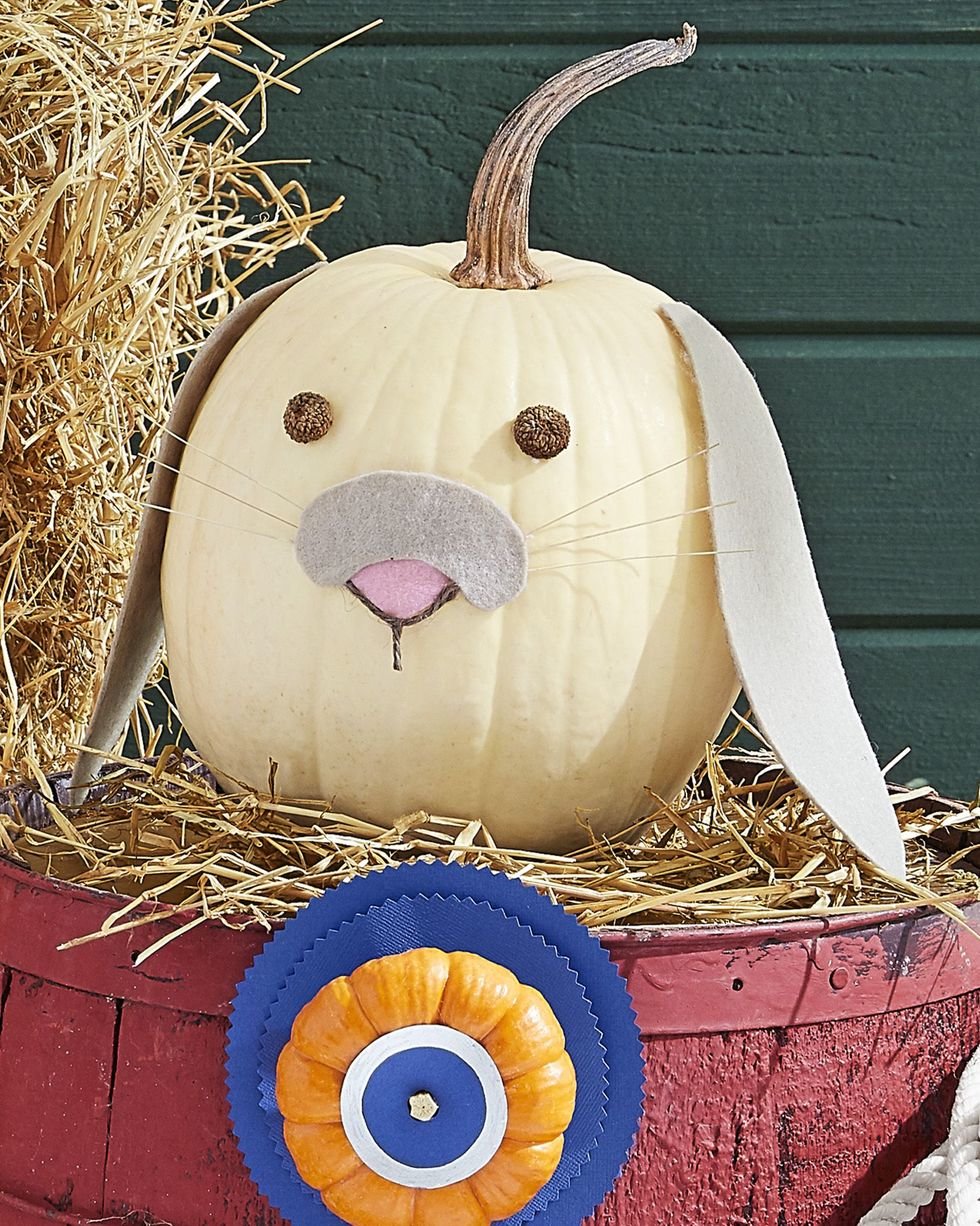
Every-bunny will love seeing this adorable decoration.
Make the pumpkin: Download our ears and top nose templates to trace on gray felt, scaling up or down based on the size of your pumpkin; cut out. Trace the separate nose "button" on pink felt and cut out, again sizing accordingly. Hot-glue the pink nose button on the center of a white pumpkin. Using craft glue, attach twigs from wheat stalks to the back of the gray nose top. Glue on top of the pink button, overlapping slightly. Outline the bottom of the nose with brown twine and attach with hot glue. Attach the ears and acorn tops for eyes with hot glue.
14. Deer Pumpkin Face
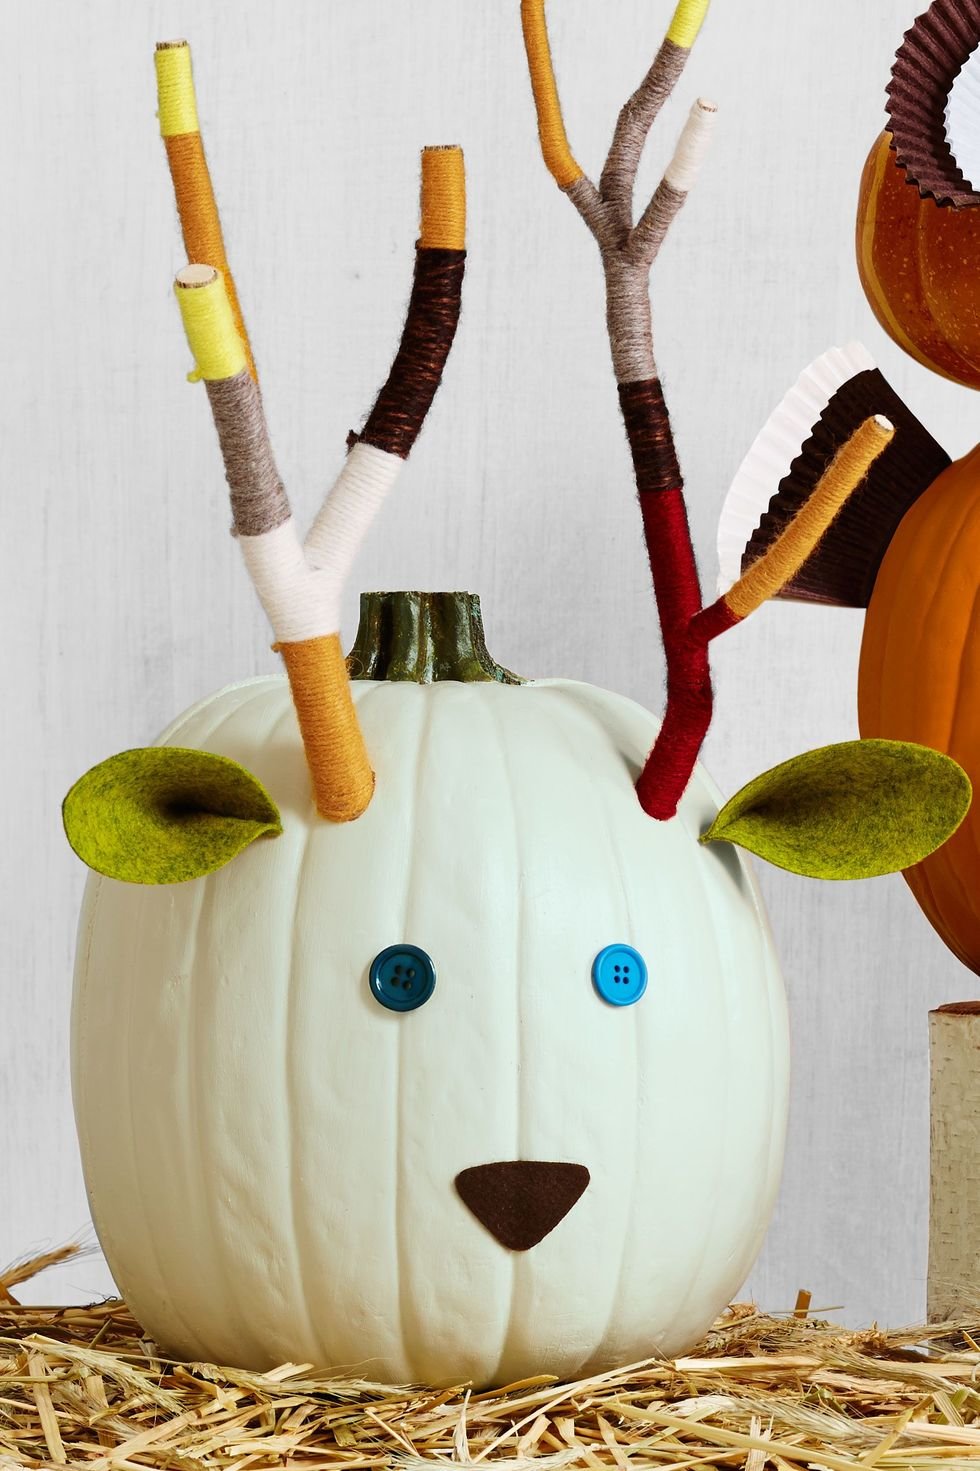
Thanks to yarn-wrapped tree branches, this woodland decoration looks just like the real deal.
Make the pumpkin: Use a plain white pumpkin (like Lumina) as the base. Assemble tree branches and tightly wrap assorted colors of yarn in color block patterns. Secure loose yarn ends with hot-glue. To attach the antlers, drill two holes into the upper third of the pumpkin, keeping the drill bit angled down so antlers stick up, not out. Attach button eyes, a triangle felt nose, and pinched felt triangle ears with hot-glue.
15. Happy Haunters Pumpkins
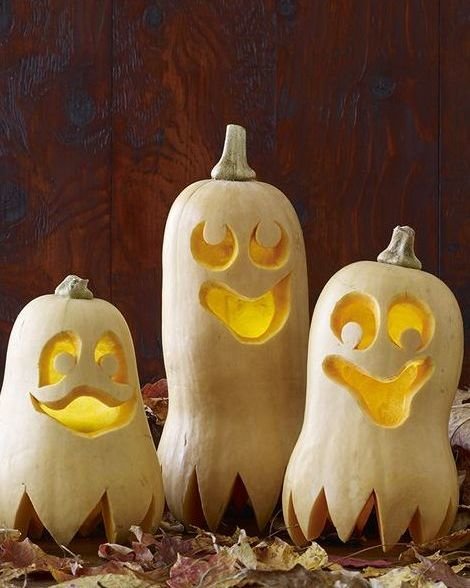
No need to look any further than the produce section to create this band of merry Halloween revelers.
Get the tutorial at Woman's Day.
16. Scarecrow Pumpkin
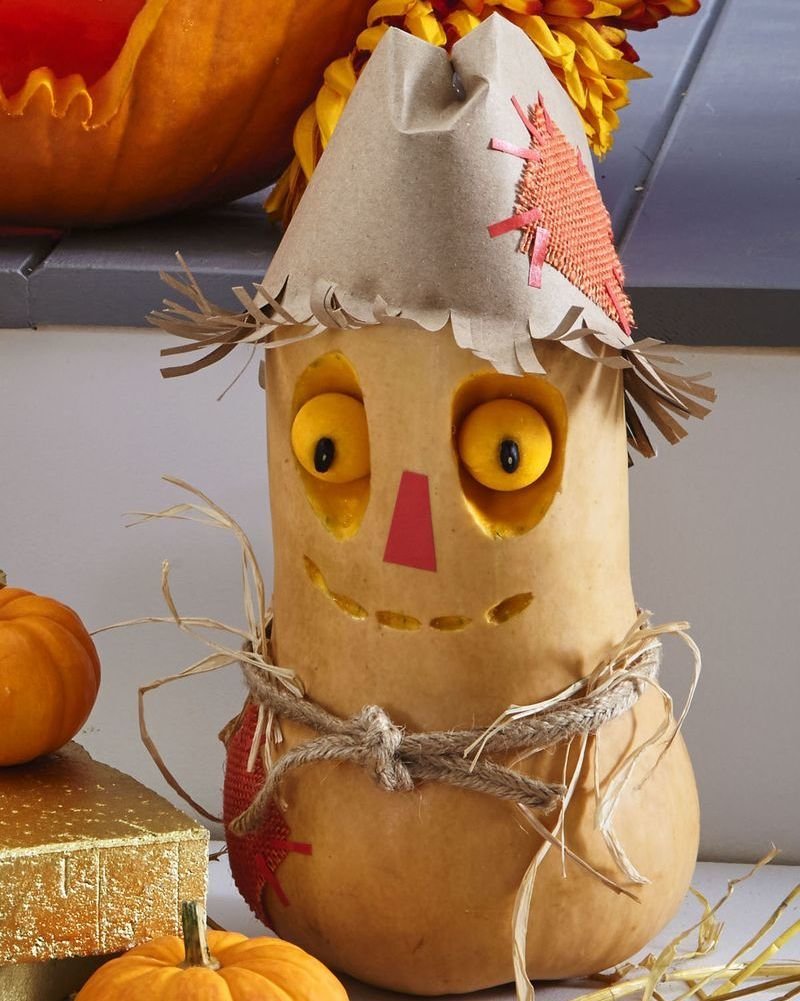
We promise this sweet fella, made out of a butternut squash, won't scare away any Halloween party guests.
Make the Scarecrow Pumpkin: Use a melon baller to scoop out two eyes from a butternut squash; reserve. Etch out eye sockets and mouth with a linoleum cutter. Use toothpicks to secure eyes in sockets. Push in dried black bean pupils; secure with toothpicks. Cut a piece of red masking tape and attach for nose. For hat, make a cone from a paper bag, then fold in its top and fringe its bottom, curling upward. Cut patches from burlap and attach with small masking tape strips. Tie cord ribbon around middle for a belt and tuck in straw.
17. Friendly Fox Pumpkin
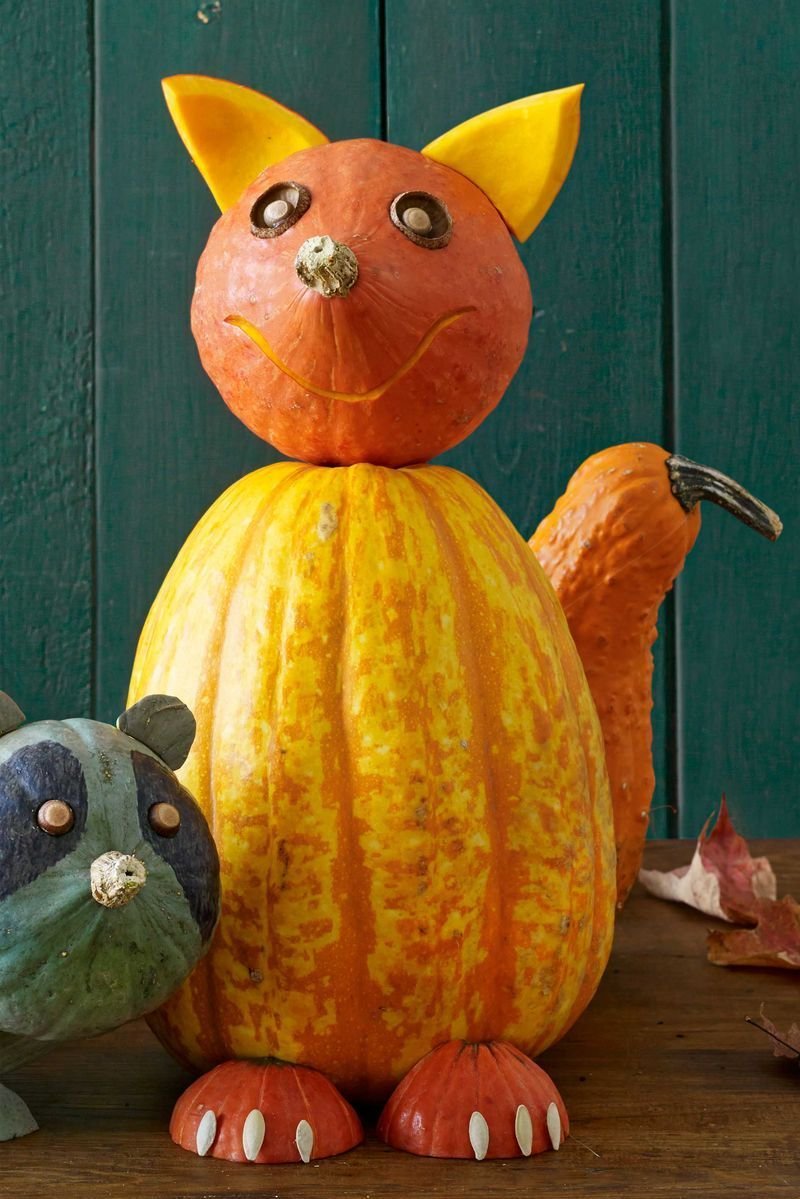
Invite this happy friend into your house or onto your front porch. He'll greet party guests and trick-or-treaters with a welcoming smile.
Make the Fox Pumpkin: Stand the variegated squash straight up. Break five skewers in half and stick them into the back of the squash where the tail should sit, leaving 2" exposed. Press the bell-shaped orange gourd into the skewers at the back of the squash to secure as the tail. (Tip: If the skewers sink into the squash too much as you attach the gourd, simply pinch each with two fingers to hold in place while the gourd slides onto the individual skewer.)
Break four skewers in half and press them into the top of the squash body, leaving 2" exposed. Position a small pumpkin so the stem is centered where the nose should sit and push down on the skewers to secure. With the tip of the craft knife, etch out a thin smile by scraping away just the top layer of rind. To create eye sockets, etch slightly deeper holes. Remove the caps of two large acorns. Flip each cap curved-side out and press into the sockets. Remove the caps of slightly smaller acorns. Apply a dot of hot glue to each acorn and affix to the eye socket caps as pupils. Using the craft knife, cut the small pumpkin into quarters (slice in half horizontally, then in half vertically), scraping away any excess flesh with the spoon. Rinse and clean a handful of seeds. Pat dry and set aside. Cut pointy ears from two of the pumpkin quarters and press into the pumpkin head with a skewer (break, as needed), allowing the fleshy side to face forward. Turn the remaining pumpkin quarters face down and use the hot glue to affix three pumpkin seeds to each to resemble claws. Secure to the body with skewers (break, as needed).
18. Vampire Pumpkin
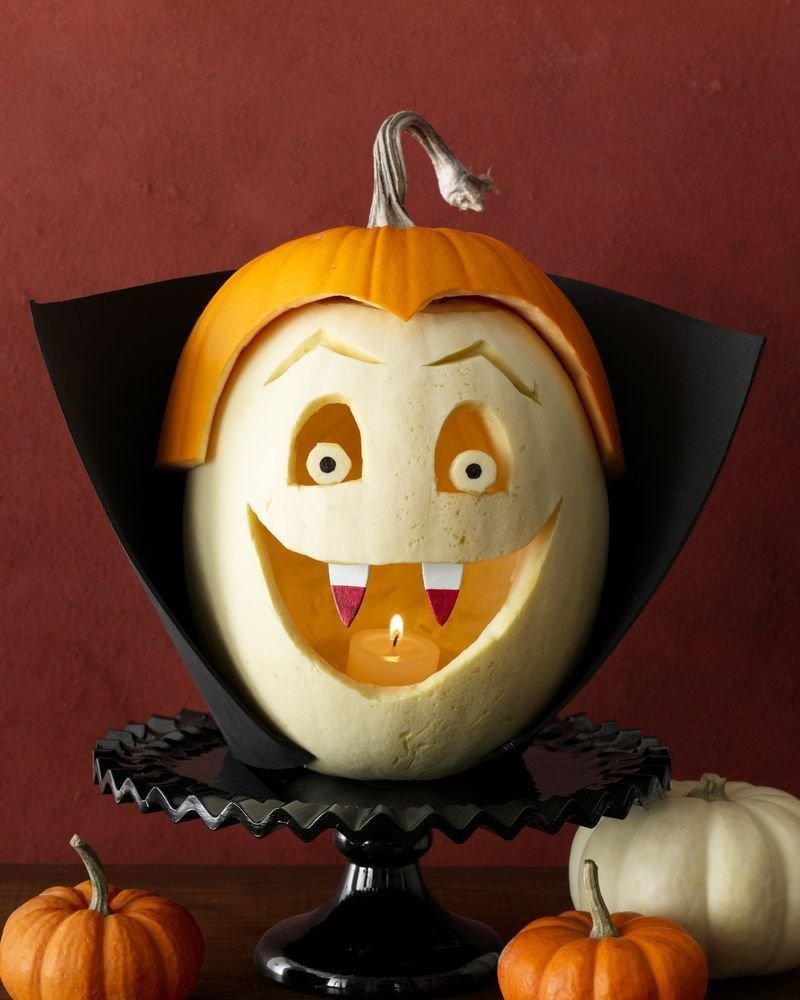
Don't worry, this blood sucking creature won't do too much harm on fright night.
Make the Thirsty Vampire Pumpkin: Carve eyes, brows, and a mouth into a hollowed-out white pumpkin. Make pupils with permanent marker. Paint large wood teardrops white with red tips to make fangs; push into place. Top with a widow's peak cut from a slightly larger orange pumpkin. Pin a black craft foam collar around the pumpkin.
19. Spa Pumpkin Faces
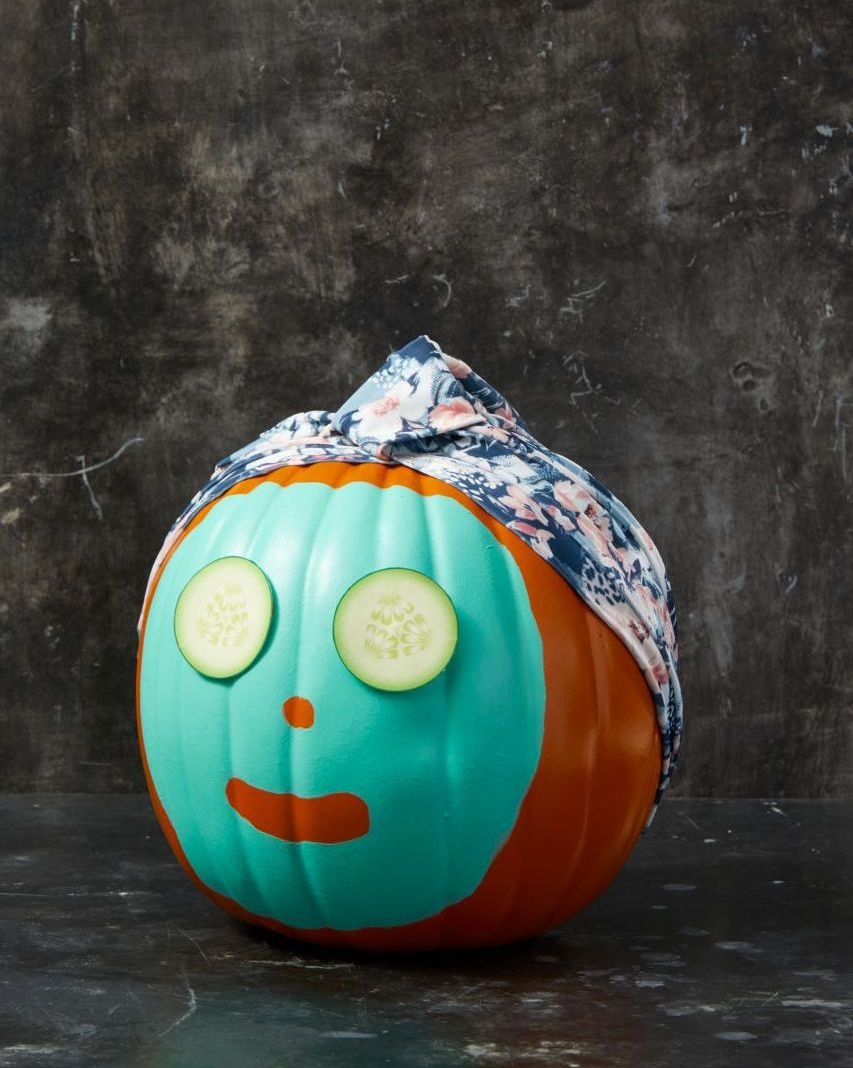
Who says pumpkins don't deserve little self-care?
Make the Pumpkin: Paint a "face mask" on a real or faux pumpkin, leaving spaces for the nose and mouth. Let it dry completely. Stretch a decorative shower cap onto the pumpkin's "head" and pin in place with straight pins. To make the cucumber eyes, just print images of cucumbers from a picture online and glue them on.
20. Mummy Pumpkin
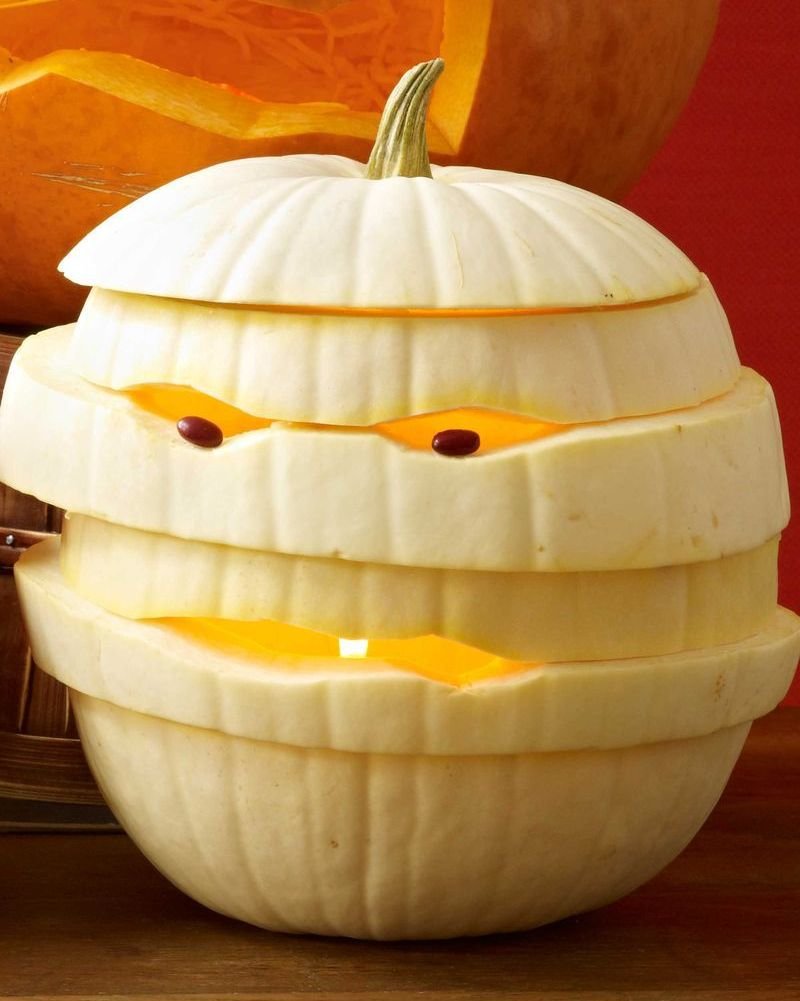
Stack layers of a cut up pumpkin to create a mummy wrapped-like appearance. Beady bean eyes will send trick-or-treaters running in fear.
Make the Mummy Pumpkin: Cut off the top one quarter of the pumpkin and scoop out the seeds. Cut pumpkin horizontally all the way around, starting 1" to 2" below the opening. Repeat 4 to 6 times until you've carved the whole pumpkin into 1" to 2" circles all the way around (don't worry about making your cuts particularly straight). Separate the pieces. Keeping the top and bottom pieces the same, restack the others in a different order. Rotate the pieces until you get a shape you like, enlarging the carvings for eyes or mouth. Starting from the bottom, lift each level of pumpkin, insert 3 to 4 toothpicks onto the level below, then press down to secure in place. Repeat until entire pumpkin is held together. Place beans into eye holes, securing with half-toothpicks if necessary.
21. Painted Pastel Pumpkin Faces
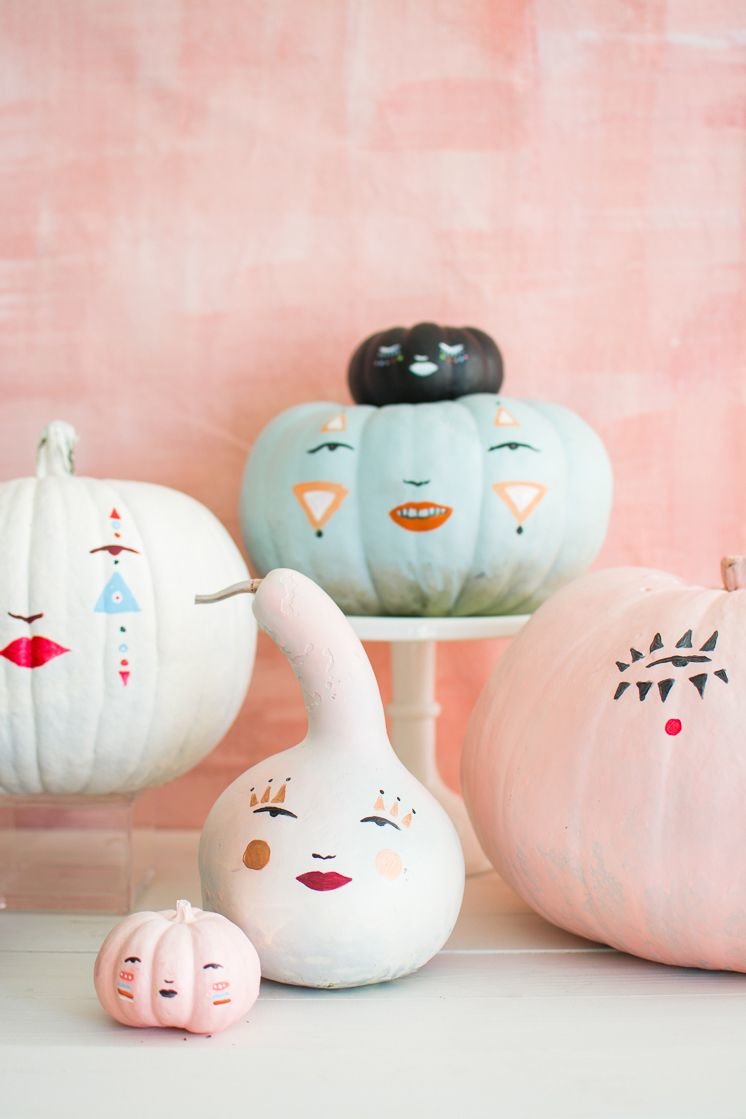
Whoever said pastels only work in the spring and summer have never seen these painted beauties, made all the more adorable by easy facial expression templates. They're a Halloween dream!
Get the tutorial at The House That Lars Built.
22. Pineapple Pumpkin Faces
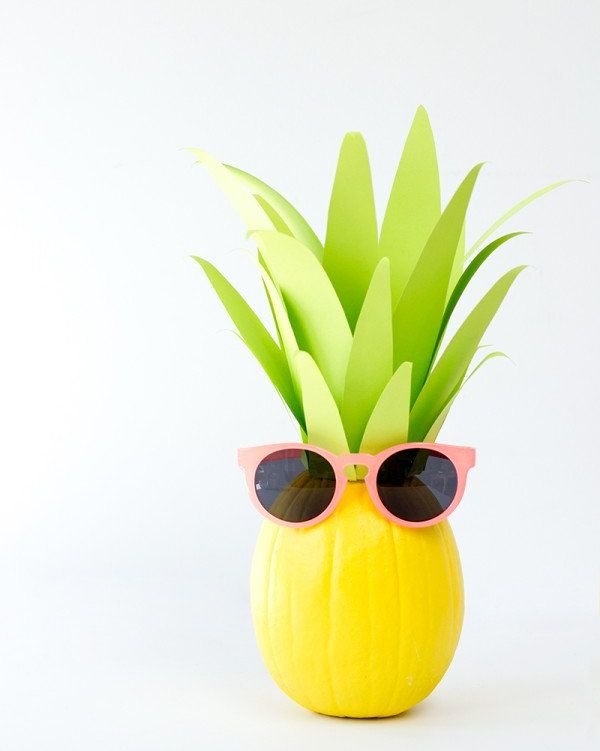
We can't imagine a more perfect jack-o'-lantern idea for anyone living in a warmer area—though this totally works on the East Coast as well! A simple pair of sunglasses is all you need to create the illusion of a face. And since this project is no-carve, you can even throw it together last minute.
Get the tutorial at Studio DIY.
23. No-Carve Pumpkin People Faces
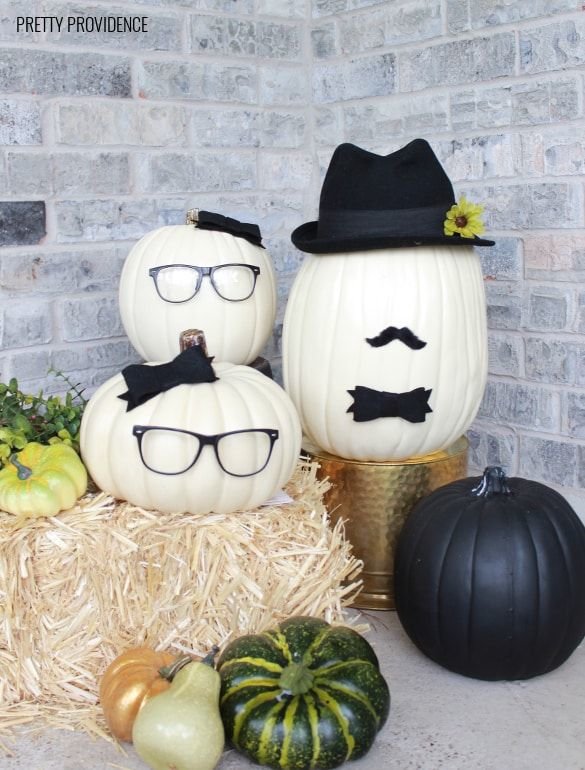
Use your family and friends as inspiration to create a gaggle of pumpkin faces!
Get the tutorial at Pretty Providence.
24. Mr. and Mrs. Pumpkin Faces
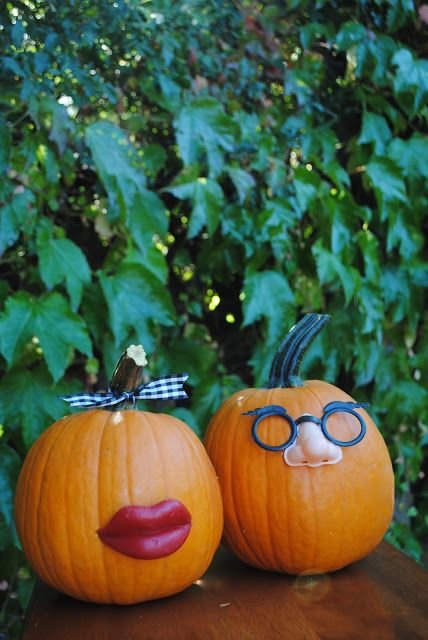
Pair off your pumpkins with quirky his and hers looks—which, might we add, also bear hilarious resemblance to Mr. and Mrs. Potato Head. They'll work perfectly with your imaginative DIY costumes.
Get the tutorial at Jacolyn Murphy.
25. Pumpkin Face Stickers
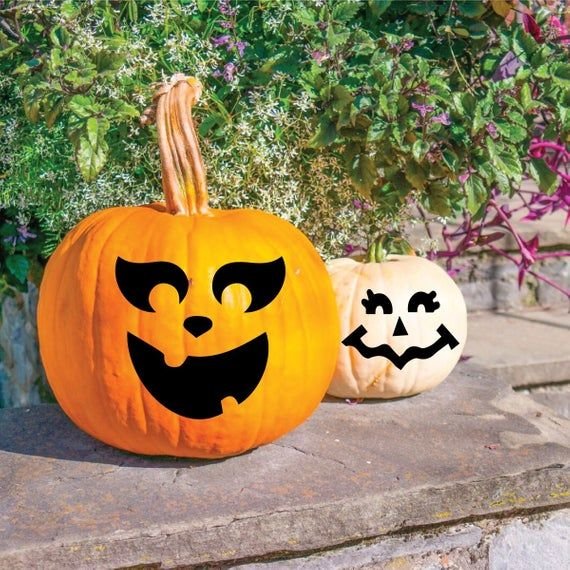
No carving or painting involved? No, it's not too good to be true thanks to this set of decorative decals. Just peel, stick, and show them off.
26. Masked Pumpkin
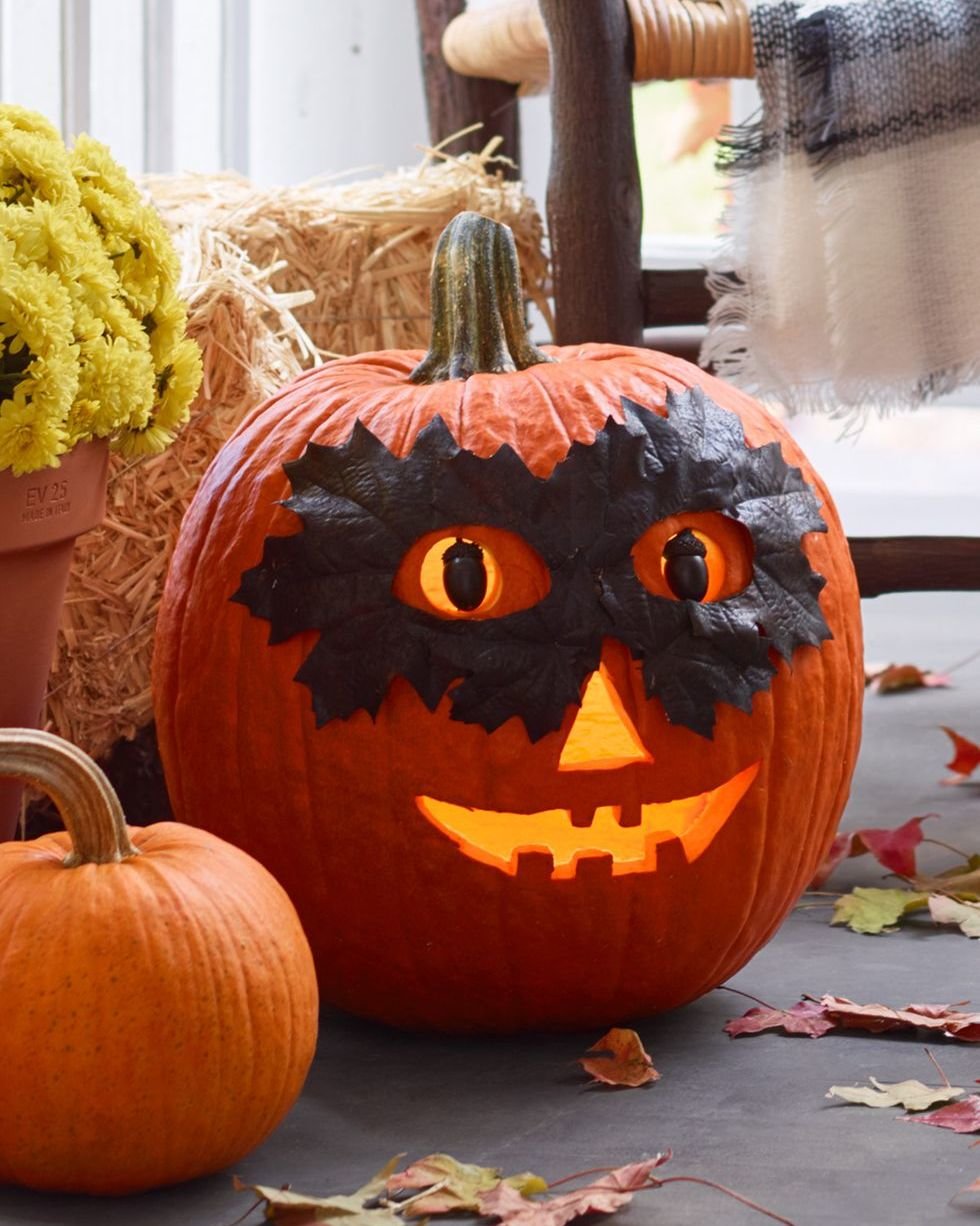
Don't worry, this masked pumpkin won't steal your candy. His leaf mask is only there to help keep the mystery alive!
Make the Masked Pumpkin: Paint eight real or artificial leaves with black spray paint; let dry. Layer leaves into a mask shape; hot-glue together. Cut eyeholes in mask. Trace eyeholes onto large orange pumpkin; carve. Glue black-painted acorns to straight pins, then push into eyeholes for pupils. Secure leaf mask to pumpkin with hot glue.
27. Swirls and Squiggles Pumpkin Face
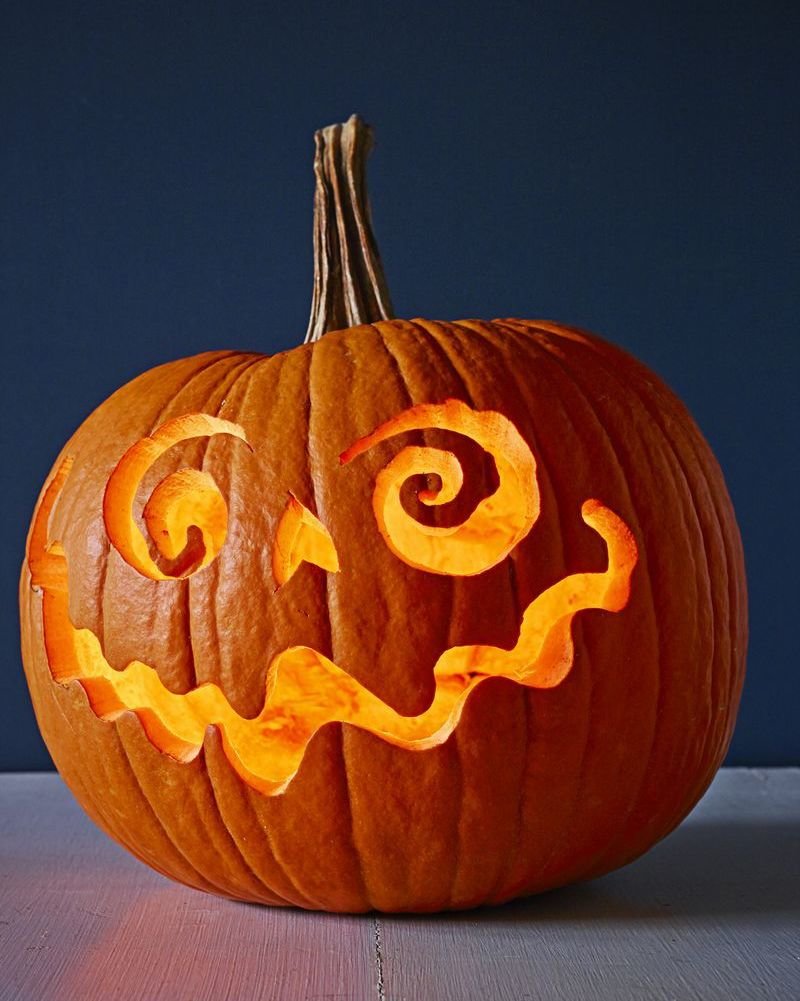
Here's the foolproof way to carve out ghoulish features: Tape transfer paper to a pumpkin and draw on your design. Then remove the paper and follow the outline.
28. Groovy Gourds
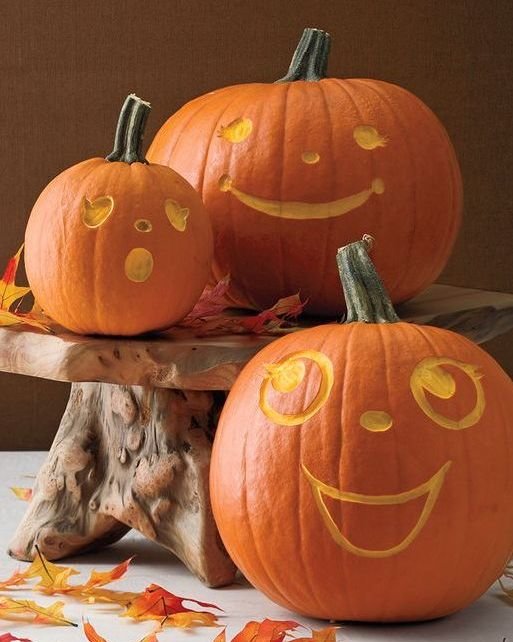
Great guests with a gaggle of smiling faces. These etched pumpkins don't requires scooping, so they'll result in little to no cleanup.
Get the tutorial at Woman's Day.
29. Eyelash Pumpkin Faces
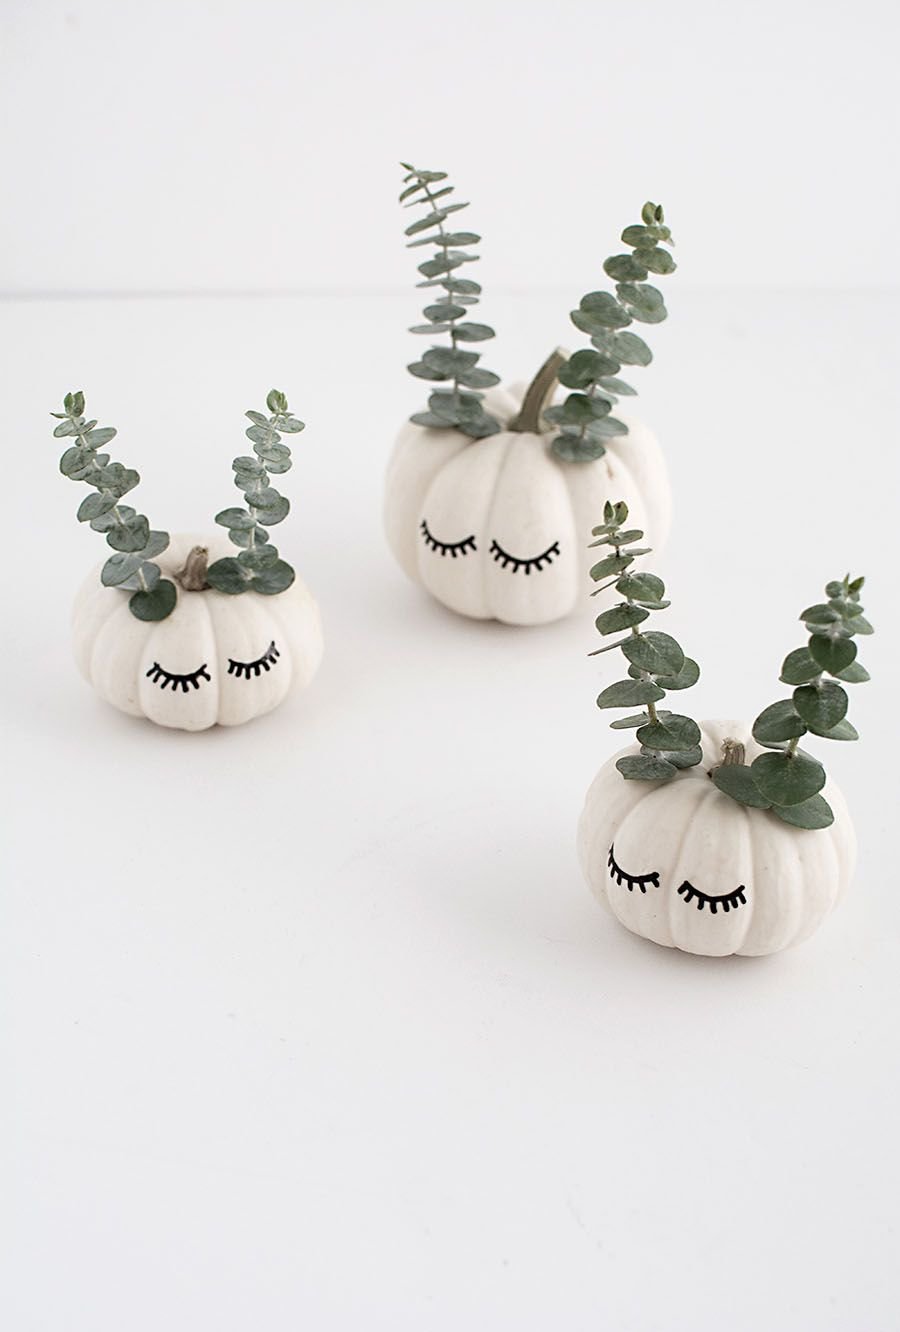
These modern mini pumpkins can make a statement in any room of the house, especially with sprigs of eucalyptus designed to look like animal antlers or ears.
Get the tutorial at Homey Oh My.
30. Felt Cat and Bat Pumpkin Faces
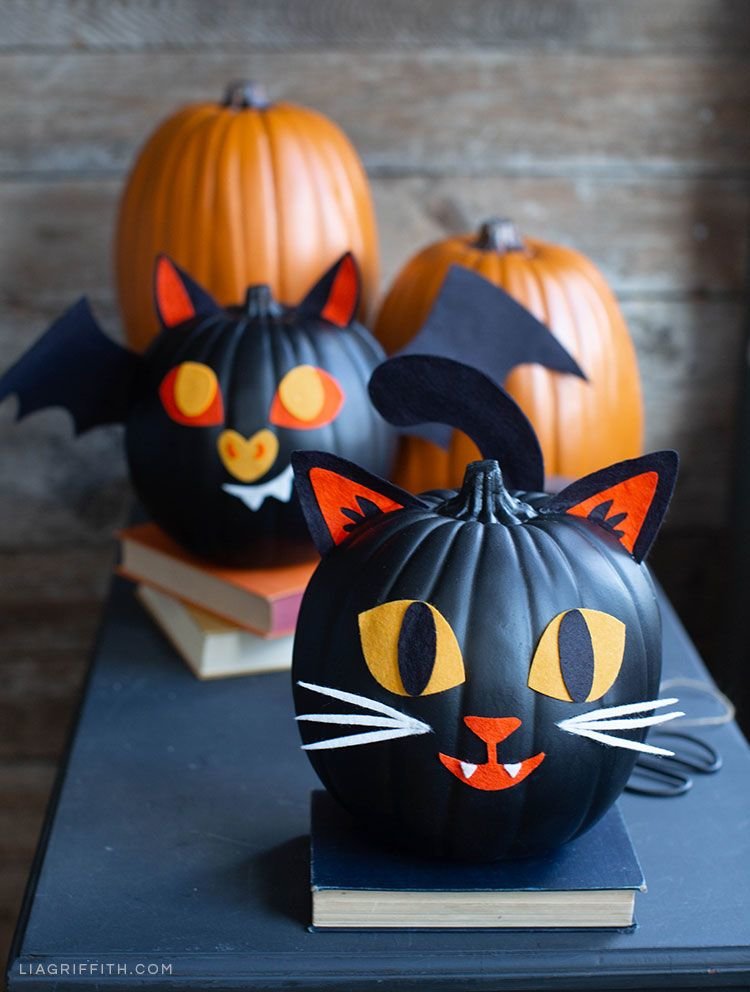
Family members of all ages can assemble felt-tastic Halloween faces on top of faux black pumpkins.
Get the tutorial at Lia Griffith.
31. Halloween Creatures Pumpkin Faces
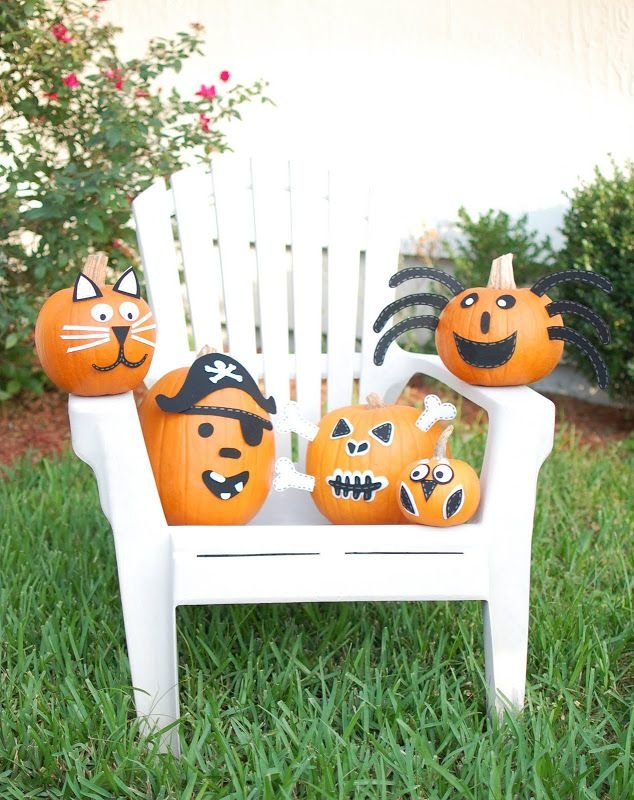
From spiders to pirates, these Halloween-inspired pumpkin creations will look hauntingly good in your yard. (Add a pirate costume of your own to keep things matchy-matchy!)
Get the tutorial at A Small Snippet.
32. Play-Doh 3D Pumpkin Faces
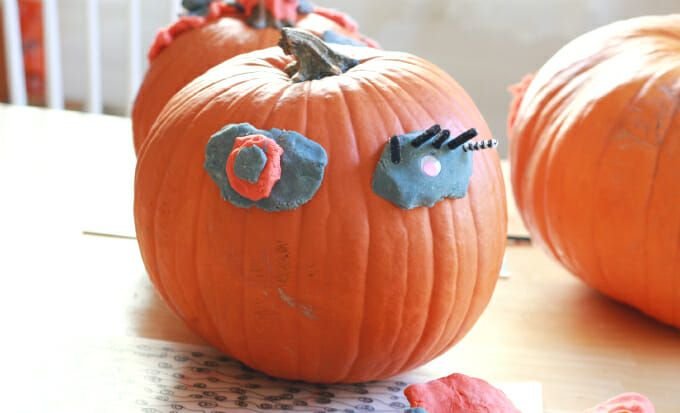
Pumpkin decorating doesn't have to be just mom or dad's job, especially when no carving is involved. Using Play-Doh, this family project lets your kids bring their best creations to life—because sentimental gourds always rival even the most pristine painted pumpkins.
Get the tutorial at The Artful Parent.


![A Tranquil Jungle House That Incorporates Japanese Ethos [Video]](https://asean2.ainewslabs.com/images/22/08/b-2ennetkmmnn_t.jpg)


