
DIY Farmhouse Pillows
If you have some basic sewing skills, making your own custom pillows is an easy farmhouse DIY project. Try using materials like thrifted feed sacks, your grandmother's tea towels, or vintage country French fabric. For a casual, unfussy look, arrange them among modern store-bought varieties. 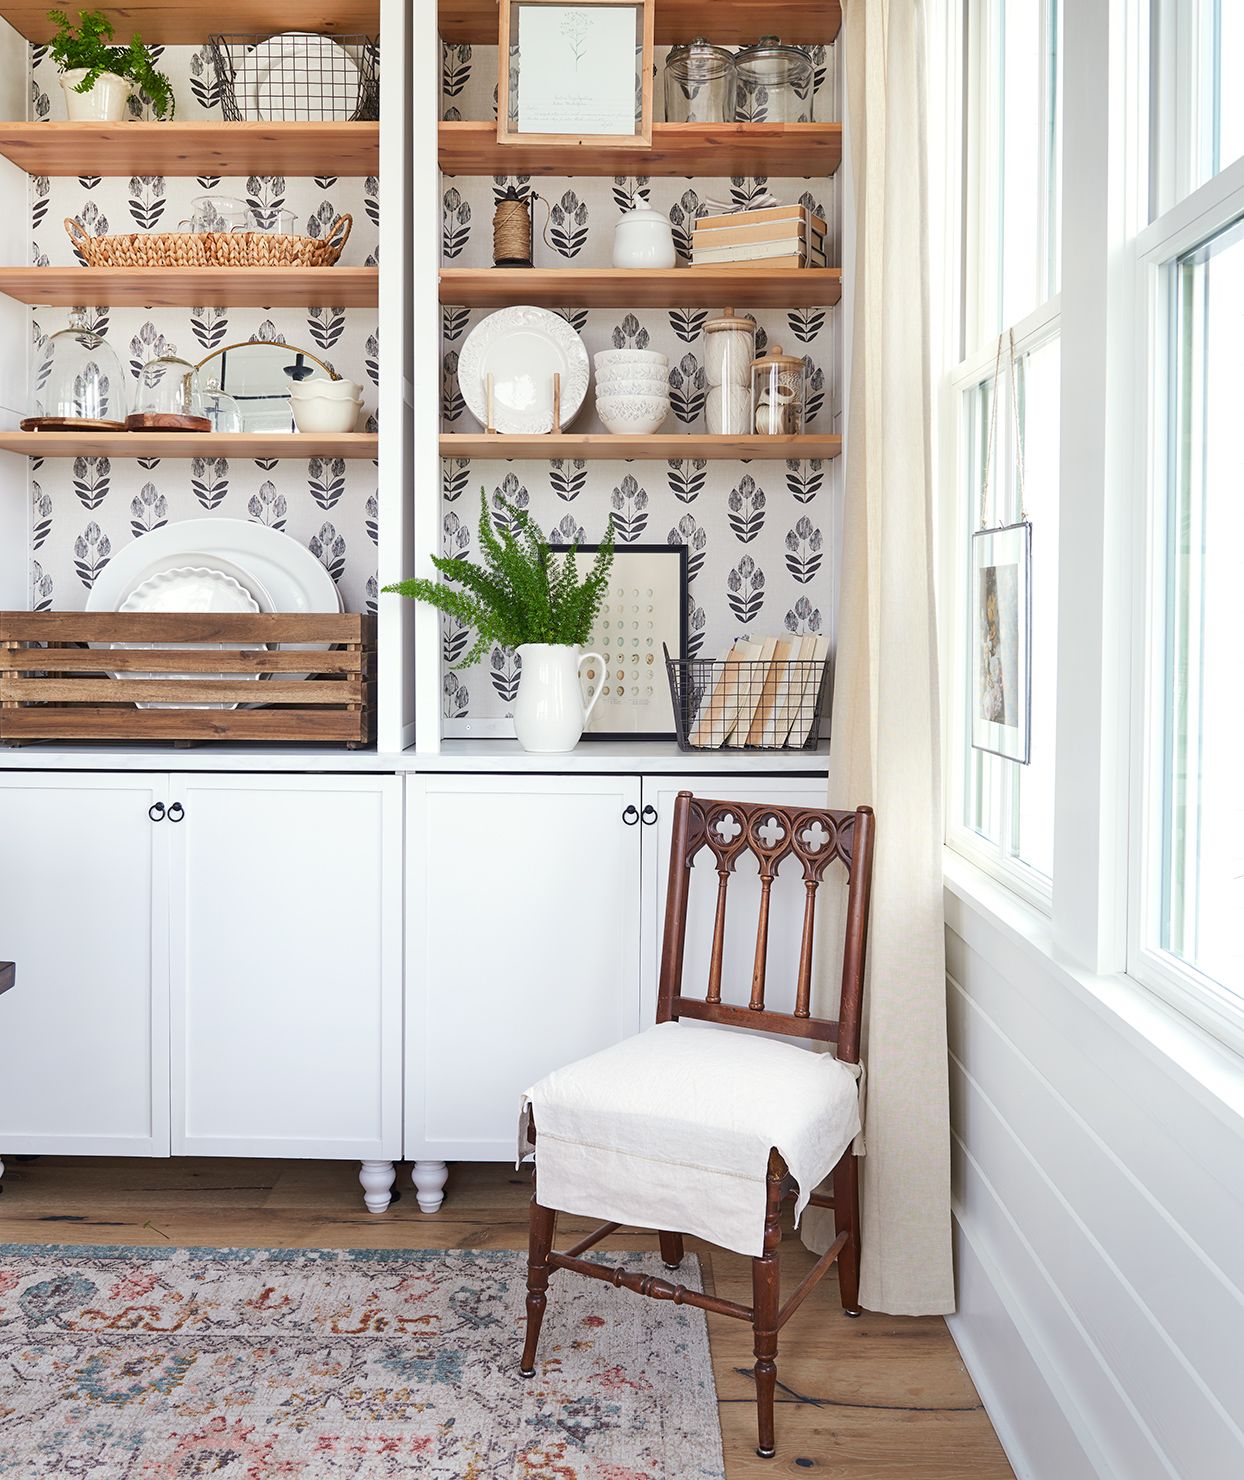
Bookcase Buffet
Basic bookshelves can stand in as a beautiful sideboard when they're lined with wallpaper; removable paper is an ideal choice if you're not ready to make a permanent decision. Or transform an armoire into a stripped-down china cabinet. Just remove the doors and install simple shelf pegs from the hardware store. For a contrasting look, sand and stain existing shelves or cut your own planks. 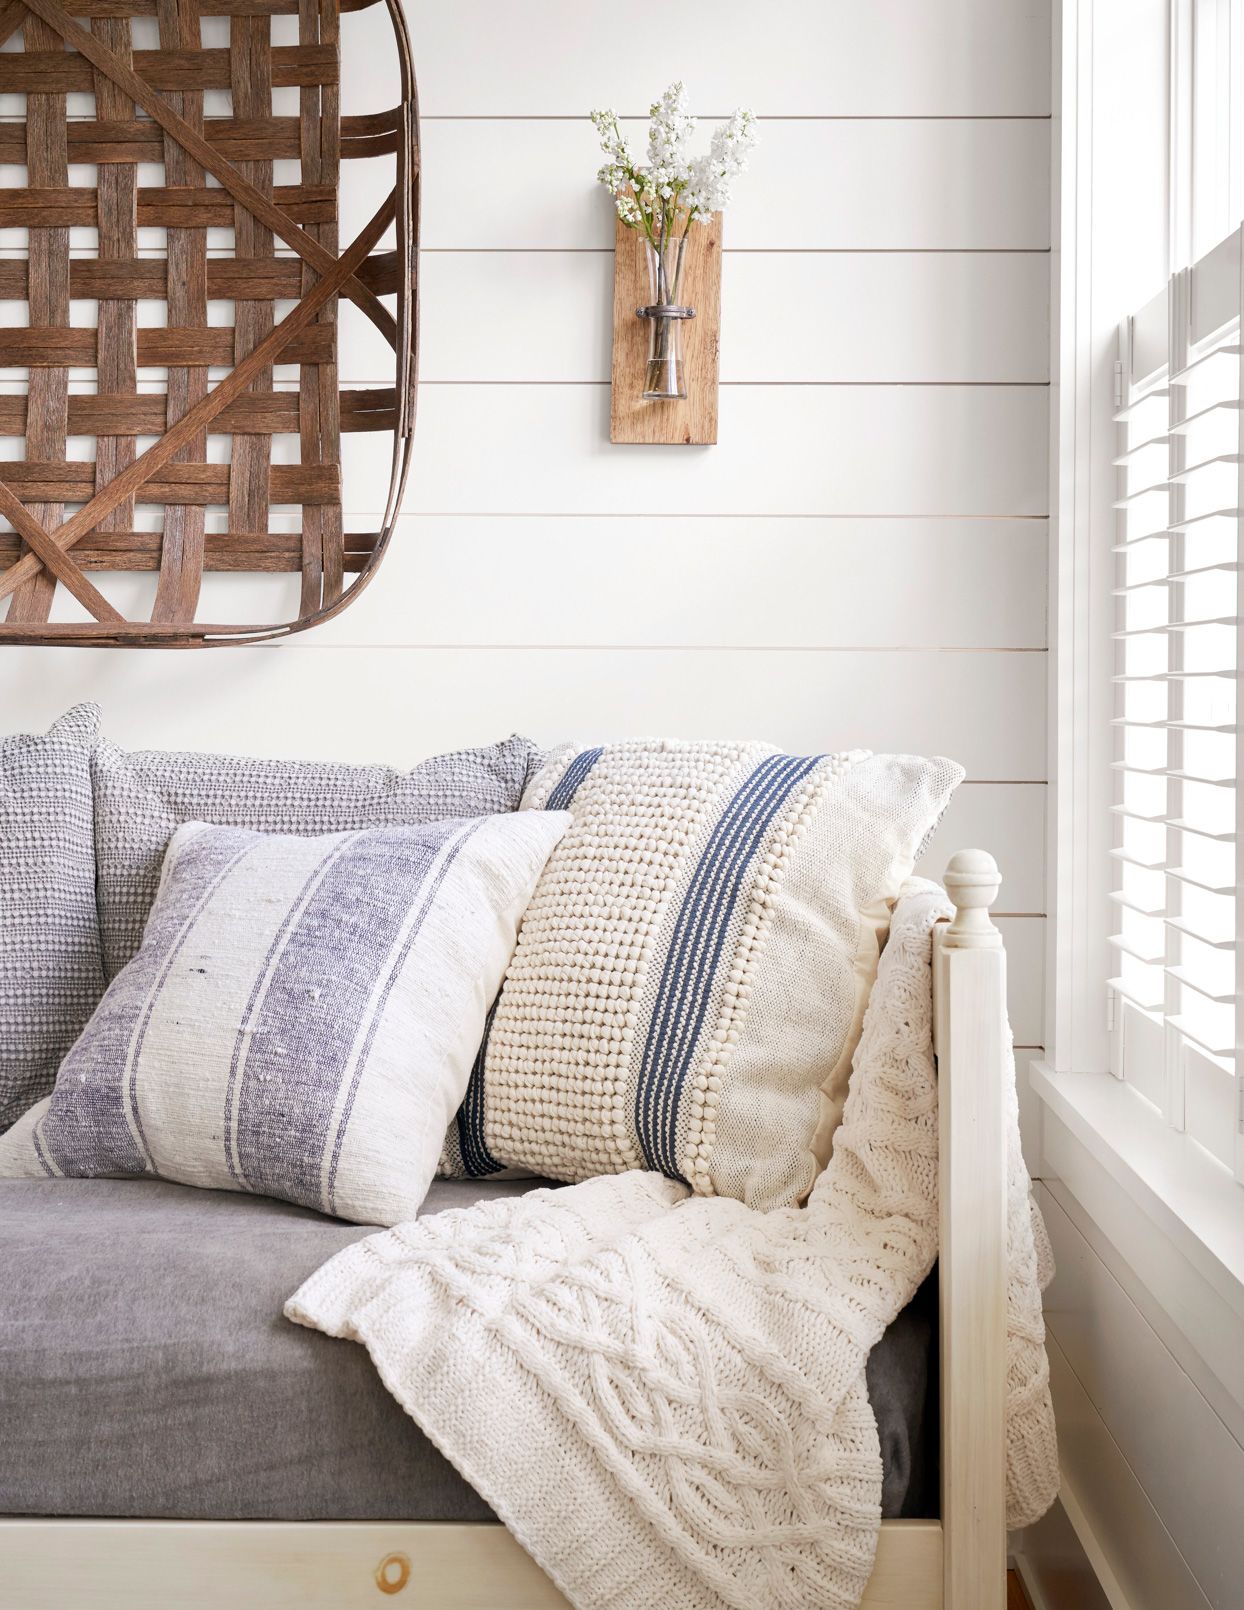
DIY Shiplap Walls
Shiplap walls might seem complicated, but with a few power tools and a little know-how, they're an easy way to add rural charm to your home. Start by cutting 4x8-foot sheets of plywood underlayment into shiplap-look planks, then sand, prime, and paint the planks. Next, mark the location of studs on your wall. Starting from the top, use a nail gun to affix the planks, making sure to hit a stud. Work your way down the wall, using a nickel to space boards evenly. For the final section, measure and cut the last plank to size for a perfect fit. Use quarter round or another molding to cover any exposed plank ends, then touch up any nicks and nail holes.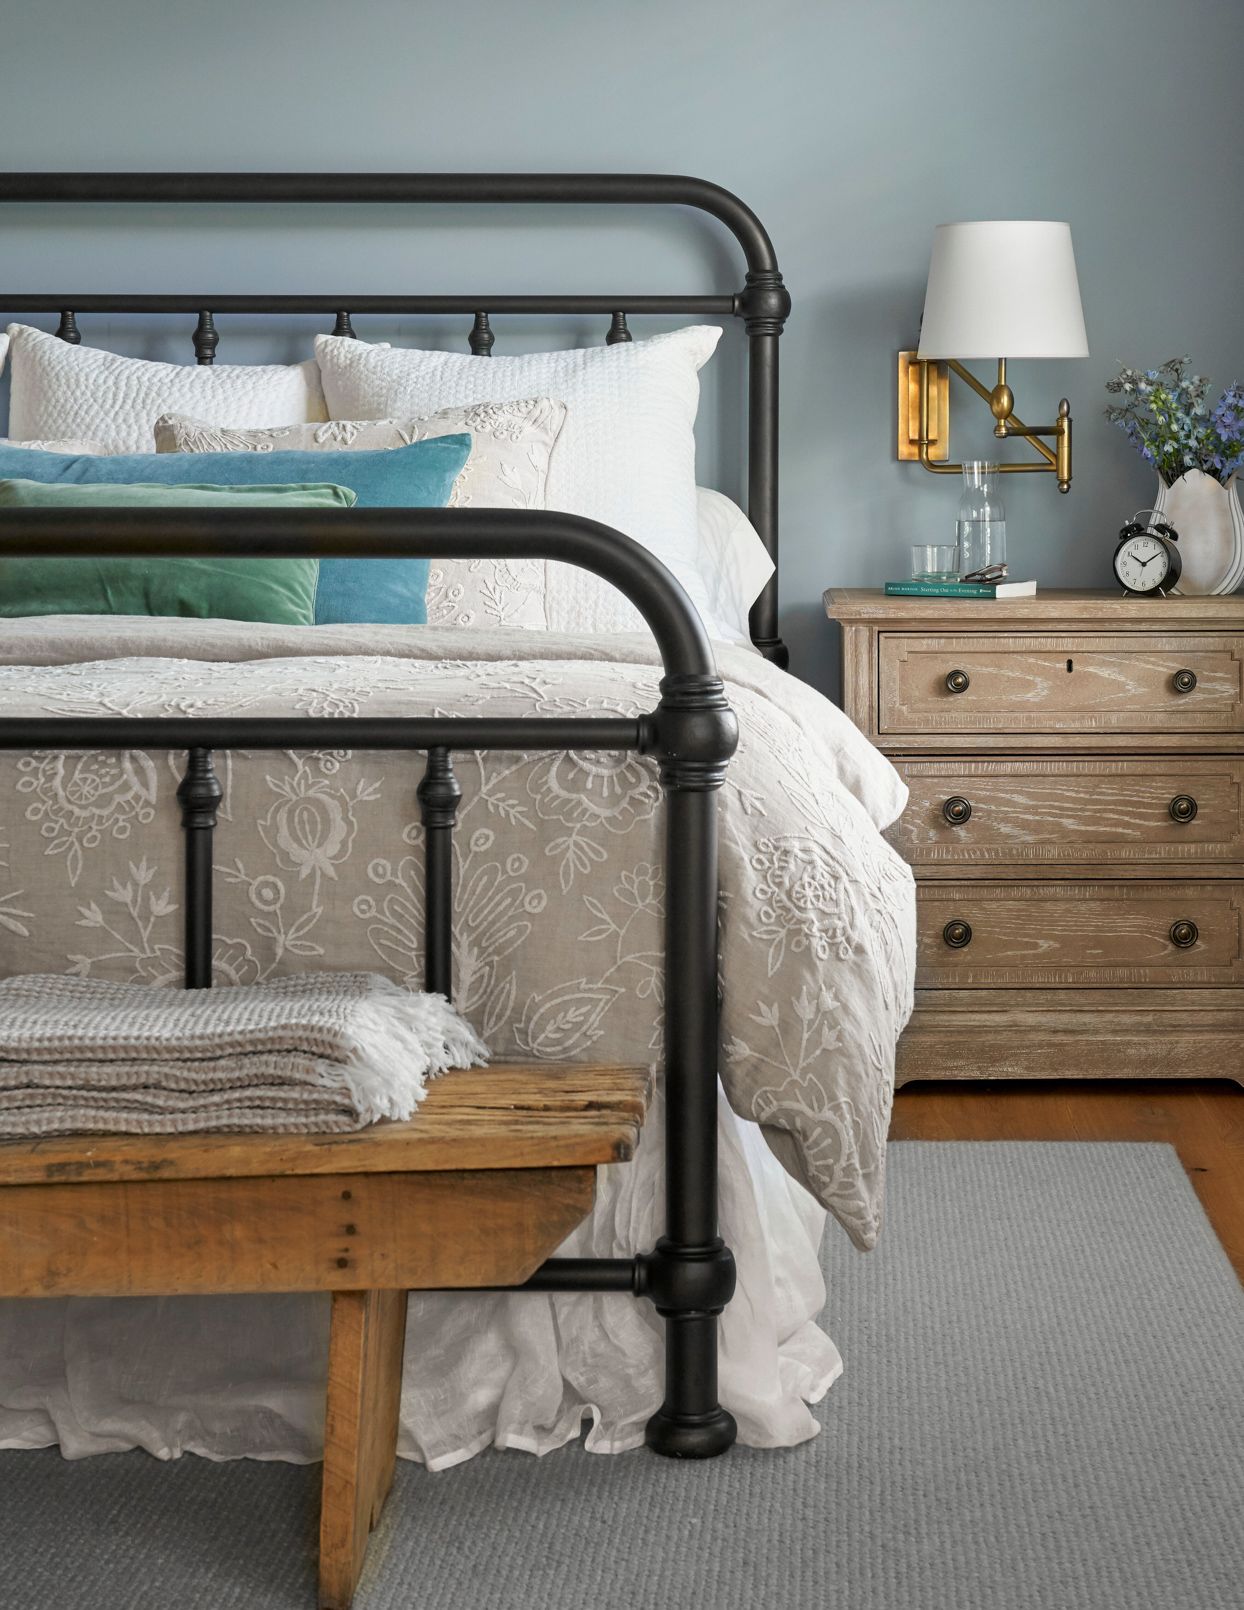
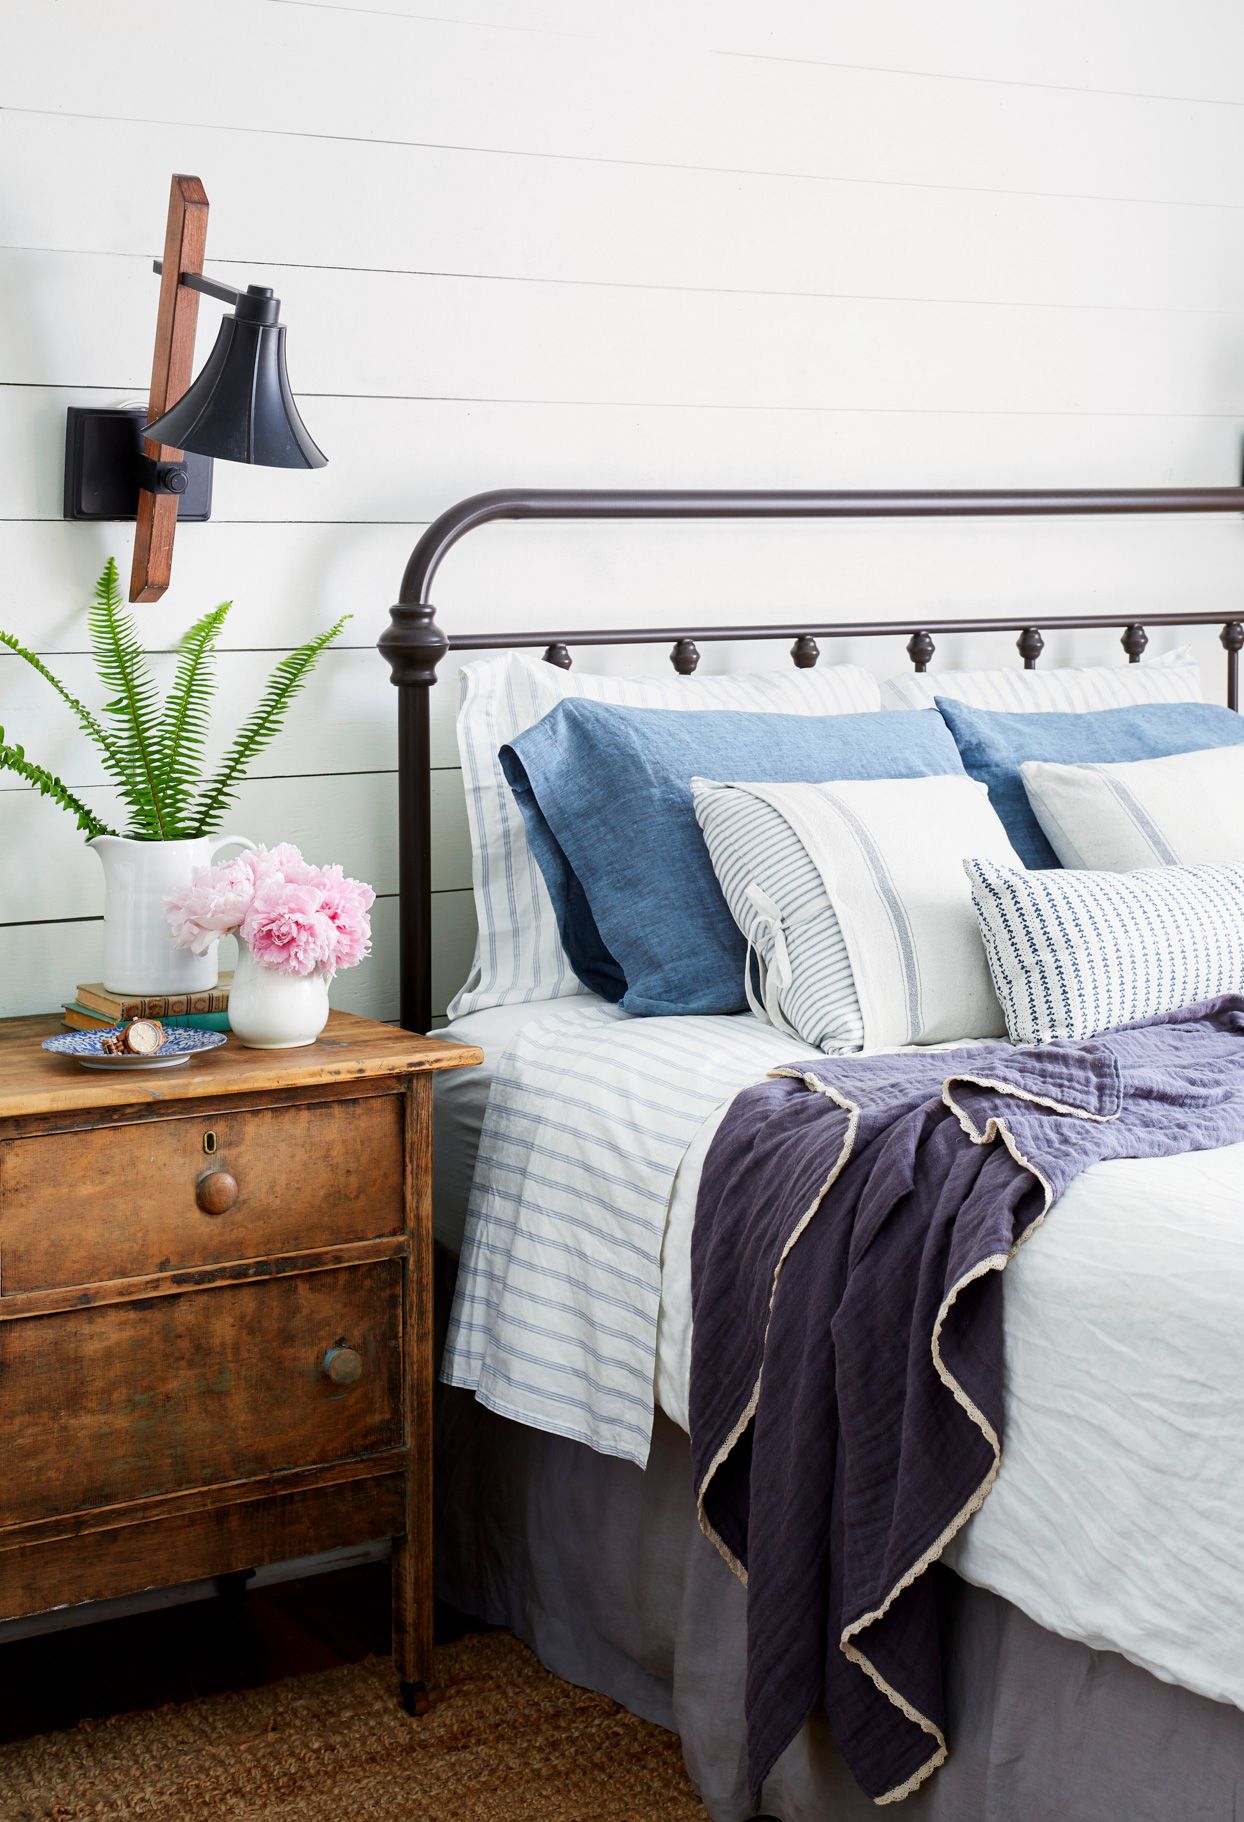
Painted Bed Frame
Refresh an old iron bed frame without spending hours sanding, priming, and hand-painting when you employ spray-on chalk-finish paint. Just scuff glossy surfaces with a sanding sponge, then apply one or two coats of paint. For a worn appearance, lightly sand after the paint has dried.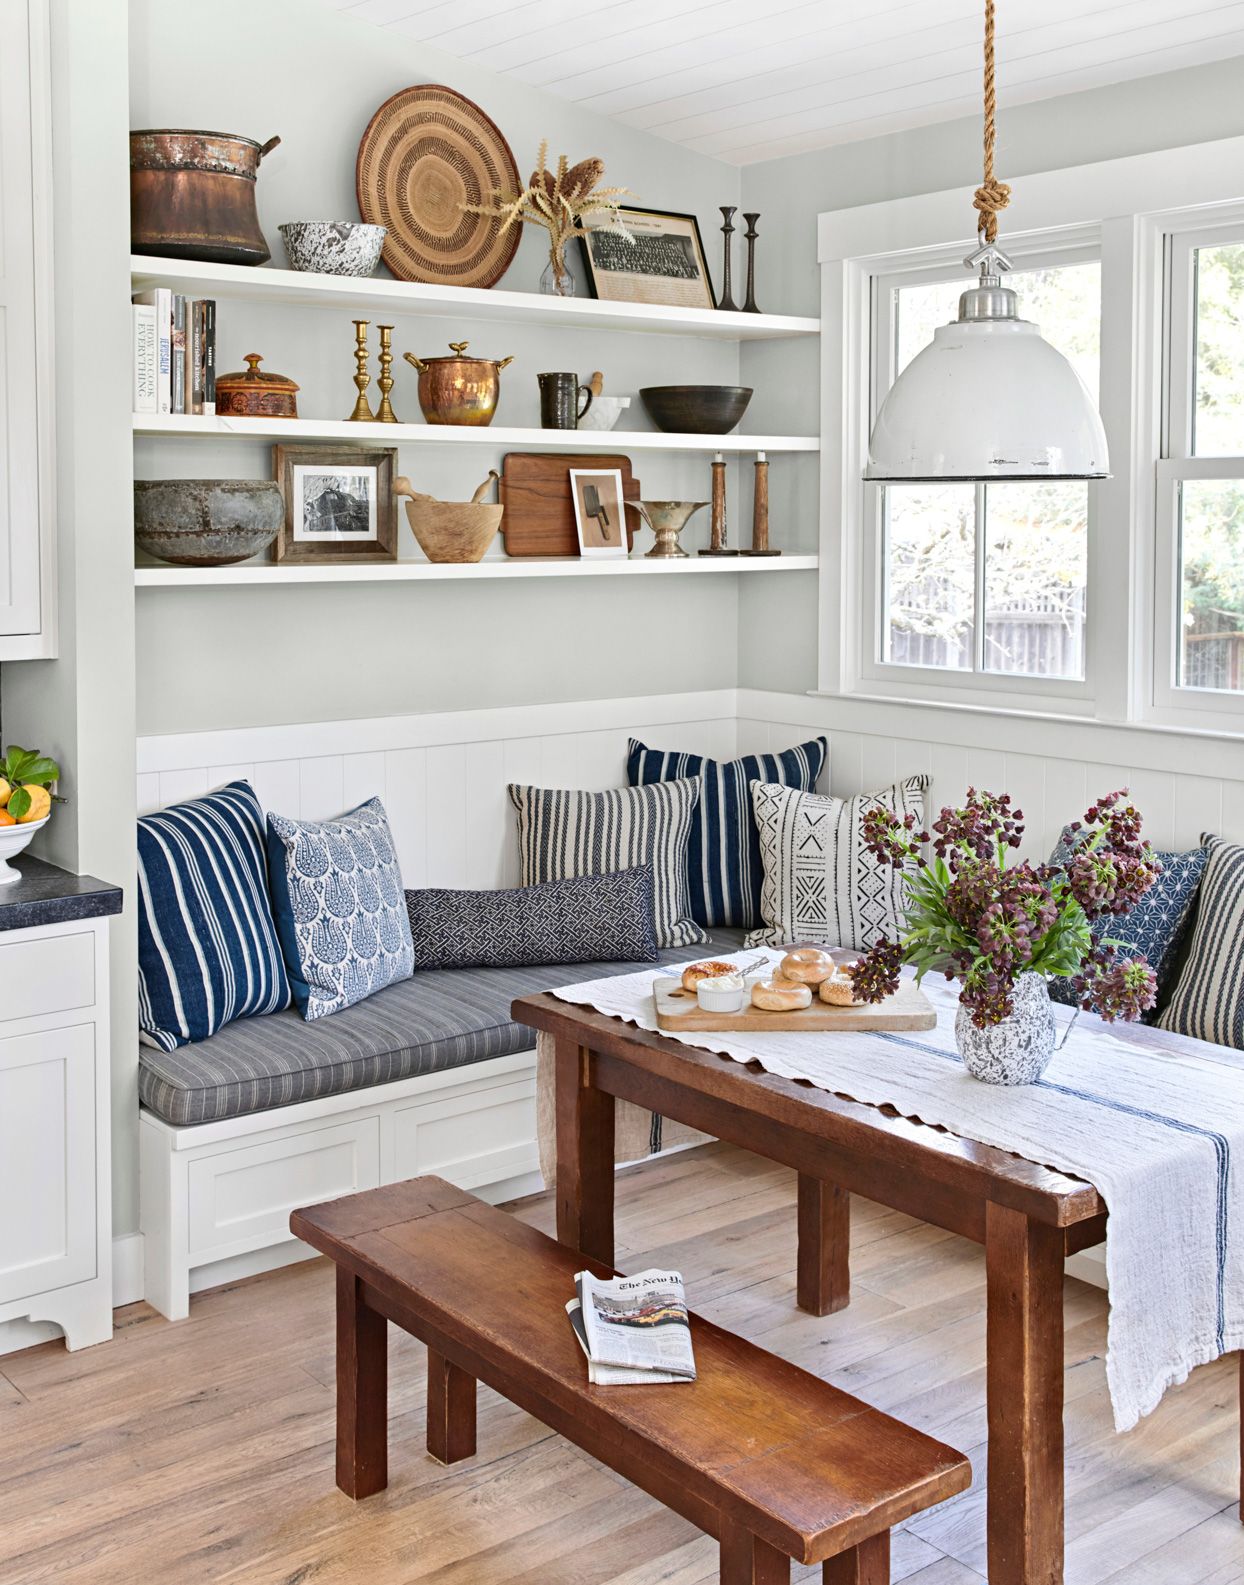
DIY Open Shelves
For a casual dining nook, display vintage serving dishes, cookbooks, heirlooms, and knickknacks on floating shelves. You can find inexpensive, easy-to-hang versions at many home retailers. For a DIY version, cut reclaimed wood to your desired size and invest in beautiful industrial shelf brackets for mounting.
Wood Slab Bench
Craft a DIY farmhouse-style bench using a live-edge wood slab. Stain and seal the wood, then attach steel legs to the underside. For added comfort, fashion a simple cushion to sit on top. After trimming the cover with piping and filling it with feathers, secure the cushion to the bench with belts.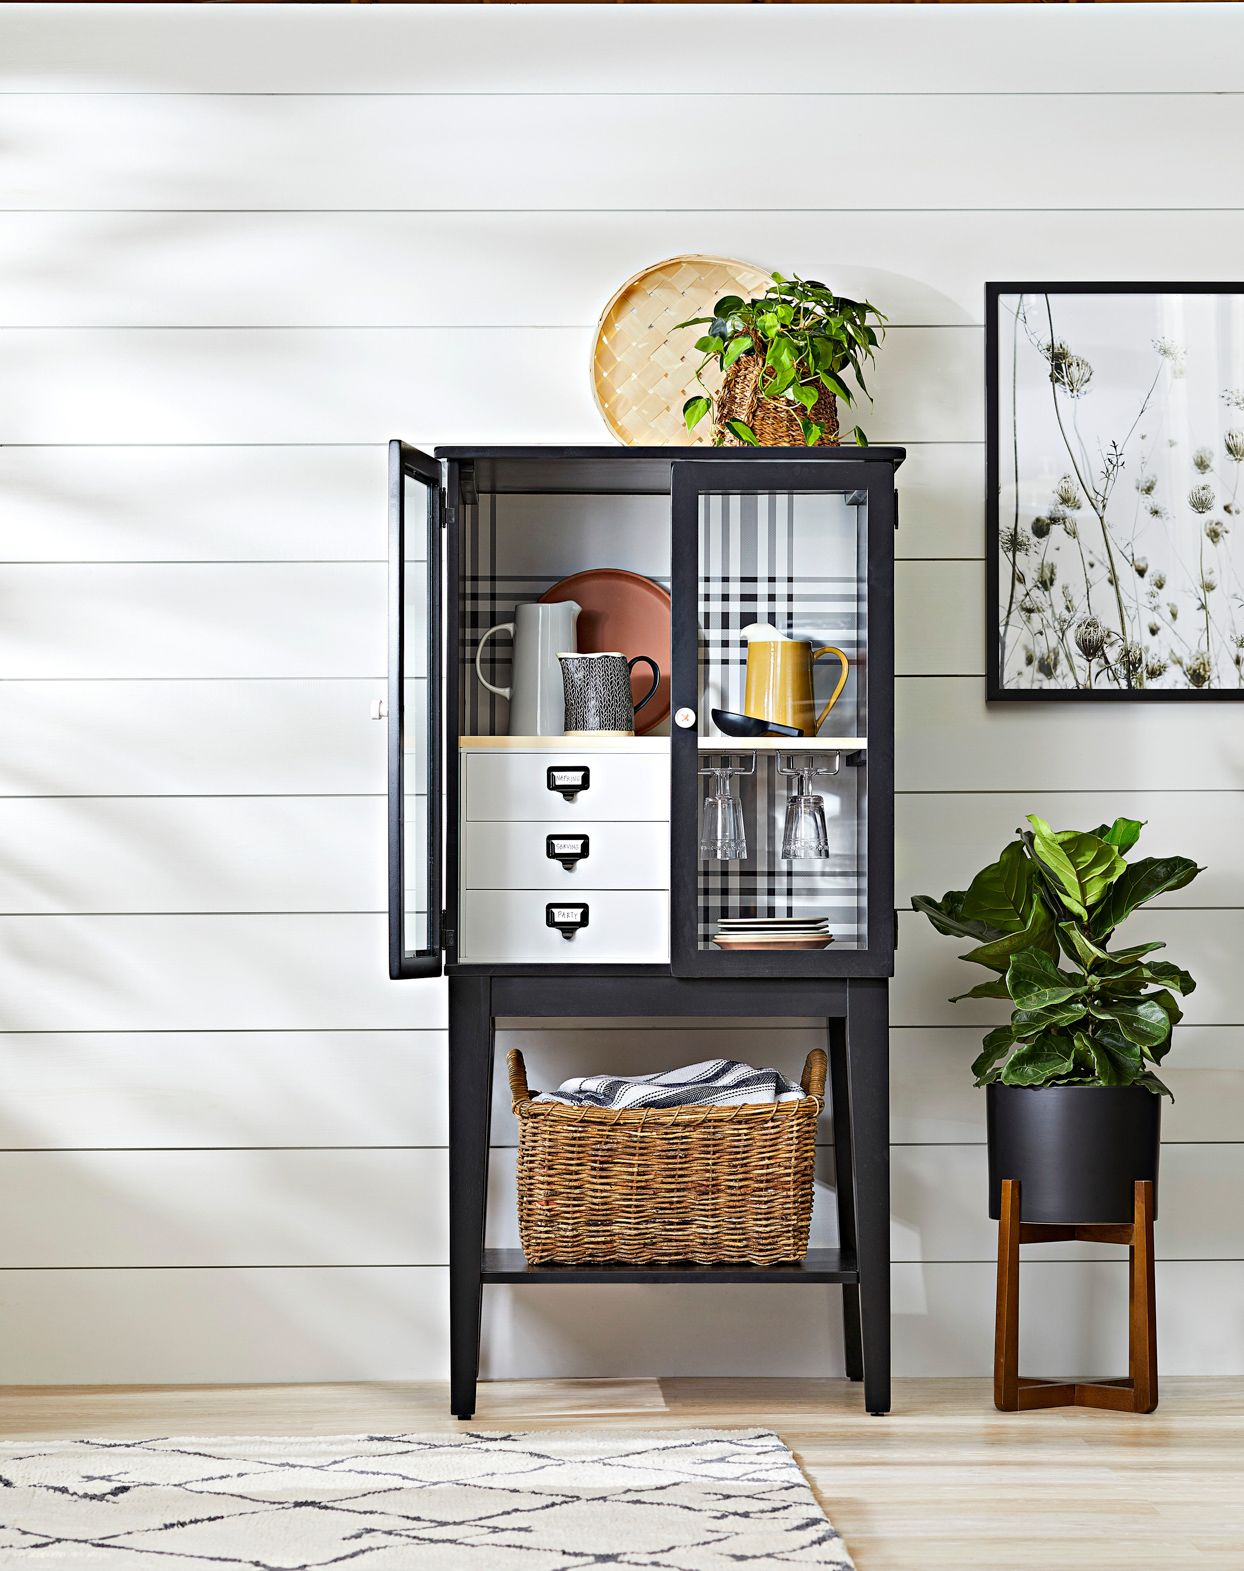
Farmhouse-Style Storage
Transform a TV armoire into a stylish serving station with a few simple updates. A painted-black finish, plaid wallpaper backing, and glass in the formerly solid doors give the piece farmhouse style. Adding mini-drawers and stemware holders inside boosts function. Glass inserts in the doors let the interior styling shine. 
Farmhouse Laundry Room Idea
Turn an unsightly laundry room into a space where you'll actually want to fold laundry. Clamp 2x4s together lengthwise and secure with wood glue, then nail atop a plywood sheet. Repeat for each countertop side. Use L brackets or corner braces to connect the plywood undersides of each panel to create a freestanding structure. Sand and stain. When dry, set atop cabinets or appliances.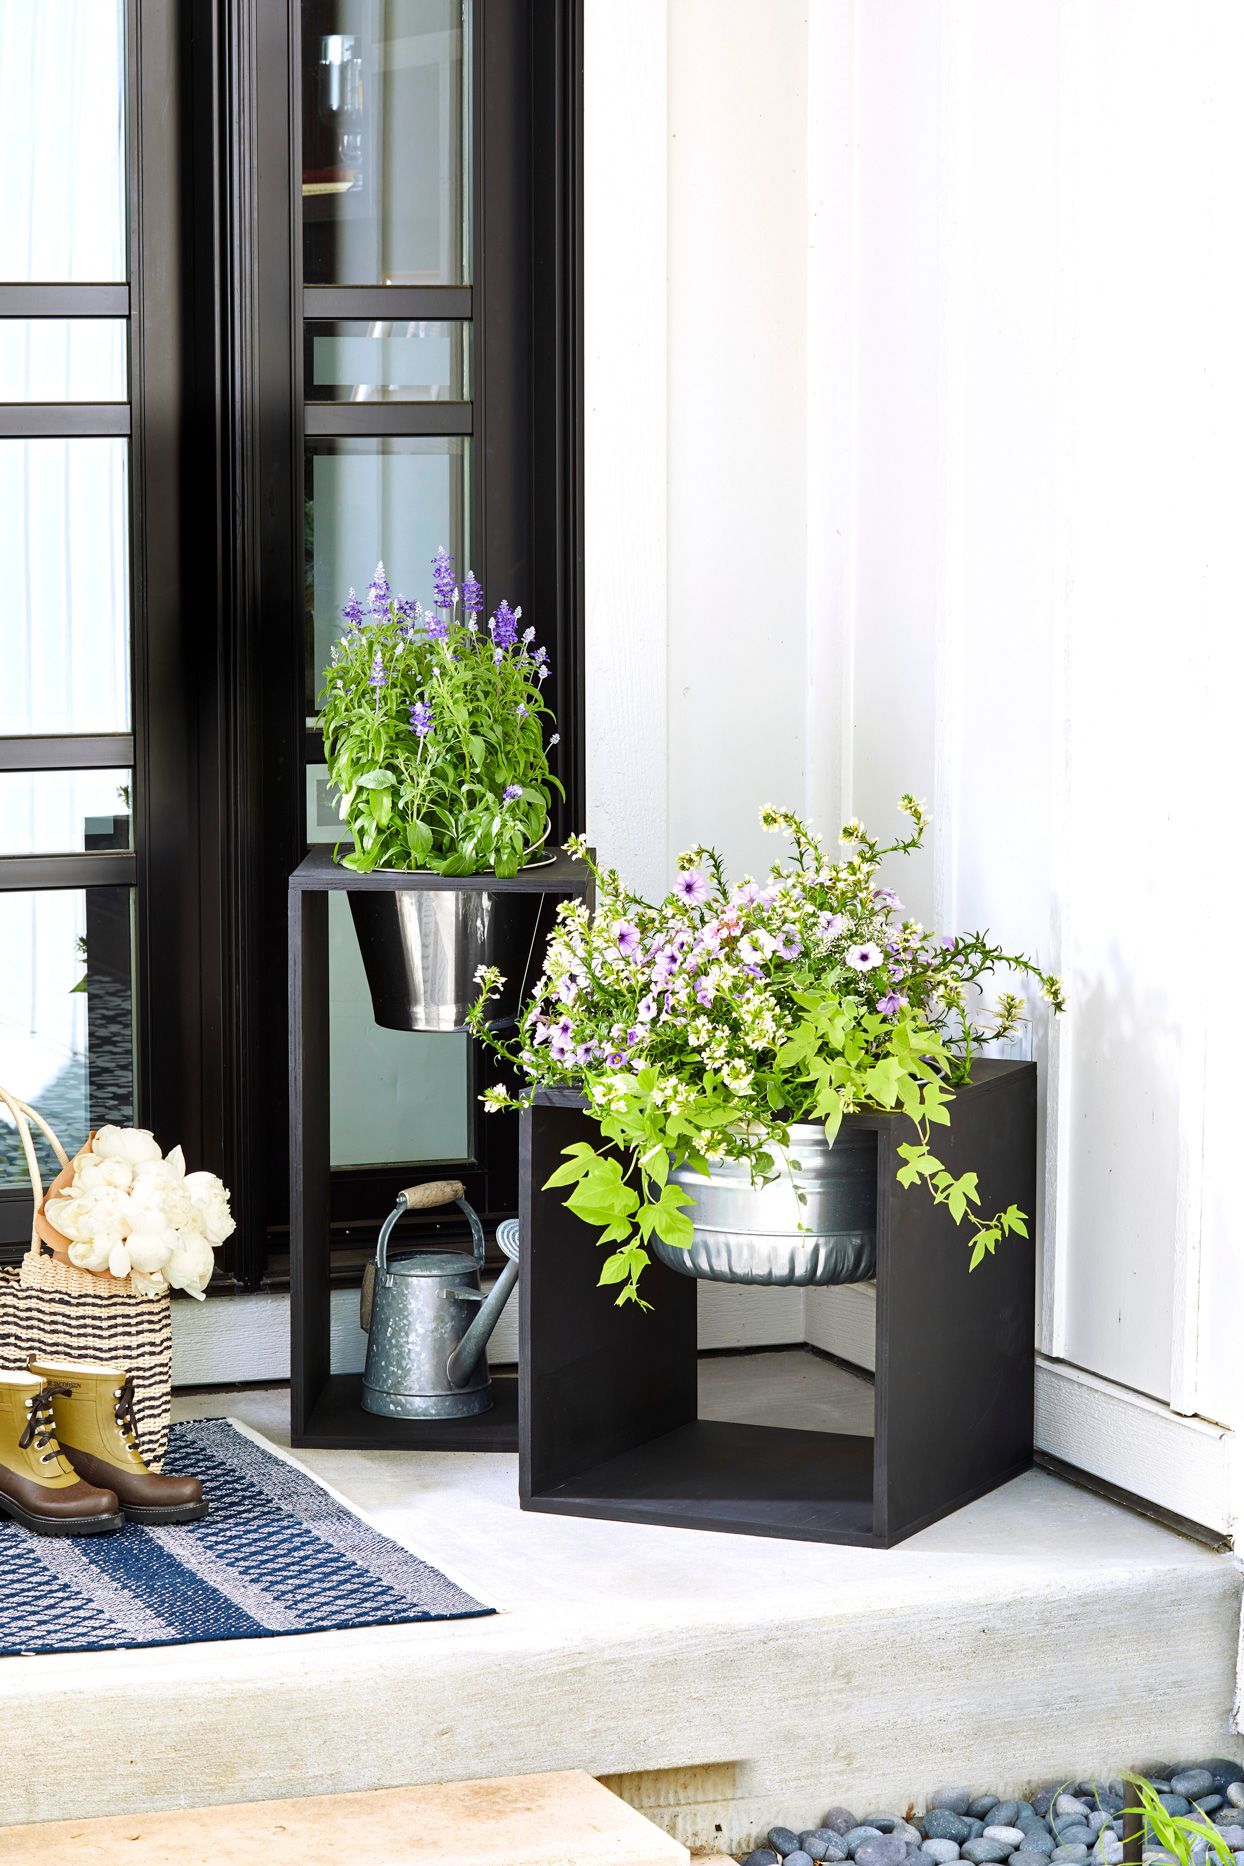
Modern Farmhouse Planters
Usher guests inside with a modern take on galvanized planters. Cut pieces of weather-resistant medium-density overlay (MDO) to form a frame for each container. On one piece, trace and cut a hole the size of your bucket's rim. Assemble the frame using wood glue and screws, then drop the bucket into the opening. 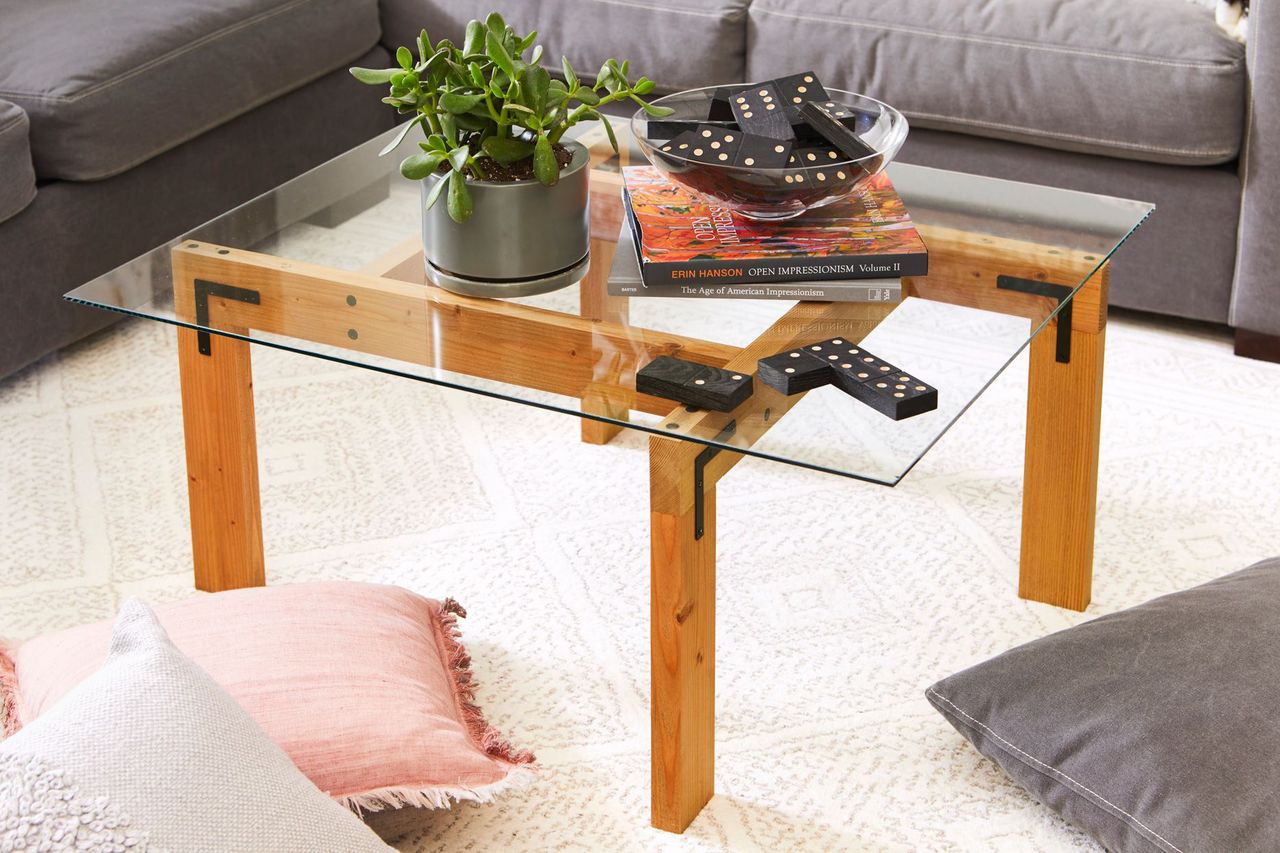
DIY Coffee Table
Construct a DIY farmhouse coffee table with a glass top, stained wood legs, and visible metal brackets. Cut 2x4s to your desired length for the legs and stretchers. To give the 2x4s a modern touch, we used a table saw to rip off the rounded edges of the pieces. Assemble the legs and stretchers into four L-shapes, then secure those together to form the table base. Stain the wood as desired, attach the metal braces, and place bumper pads on top before adding the glass top.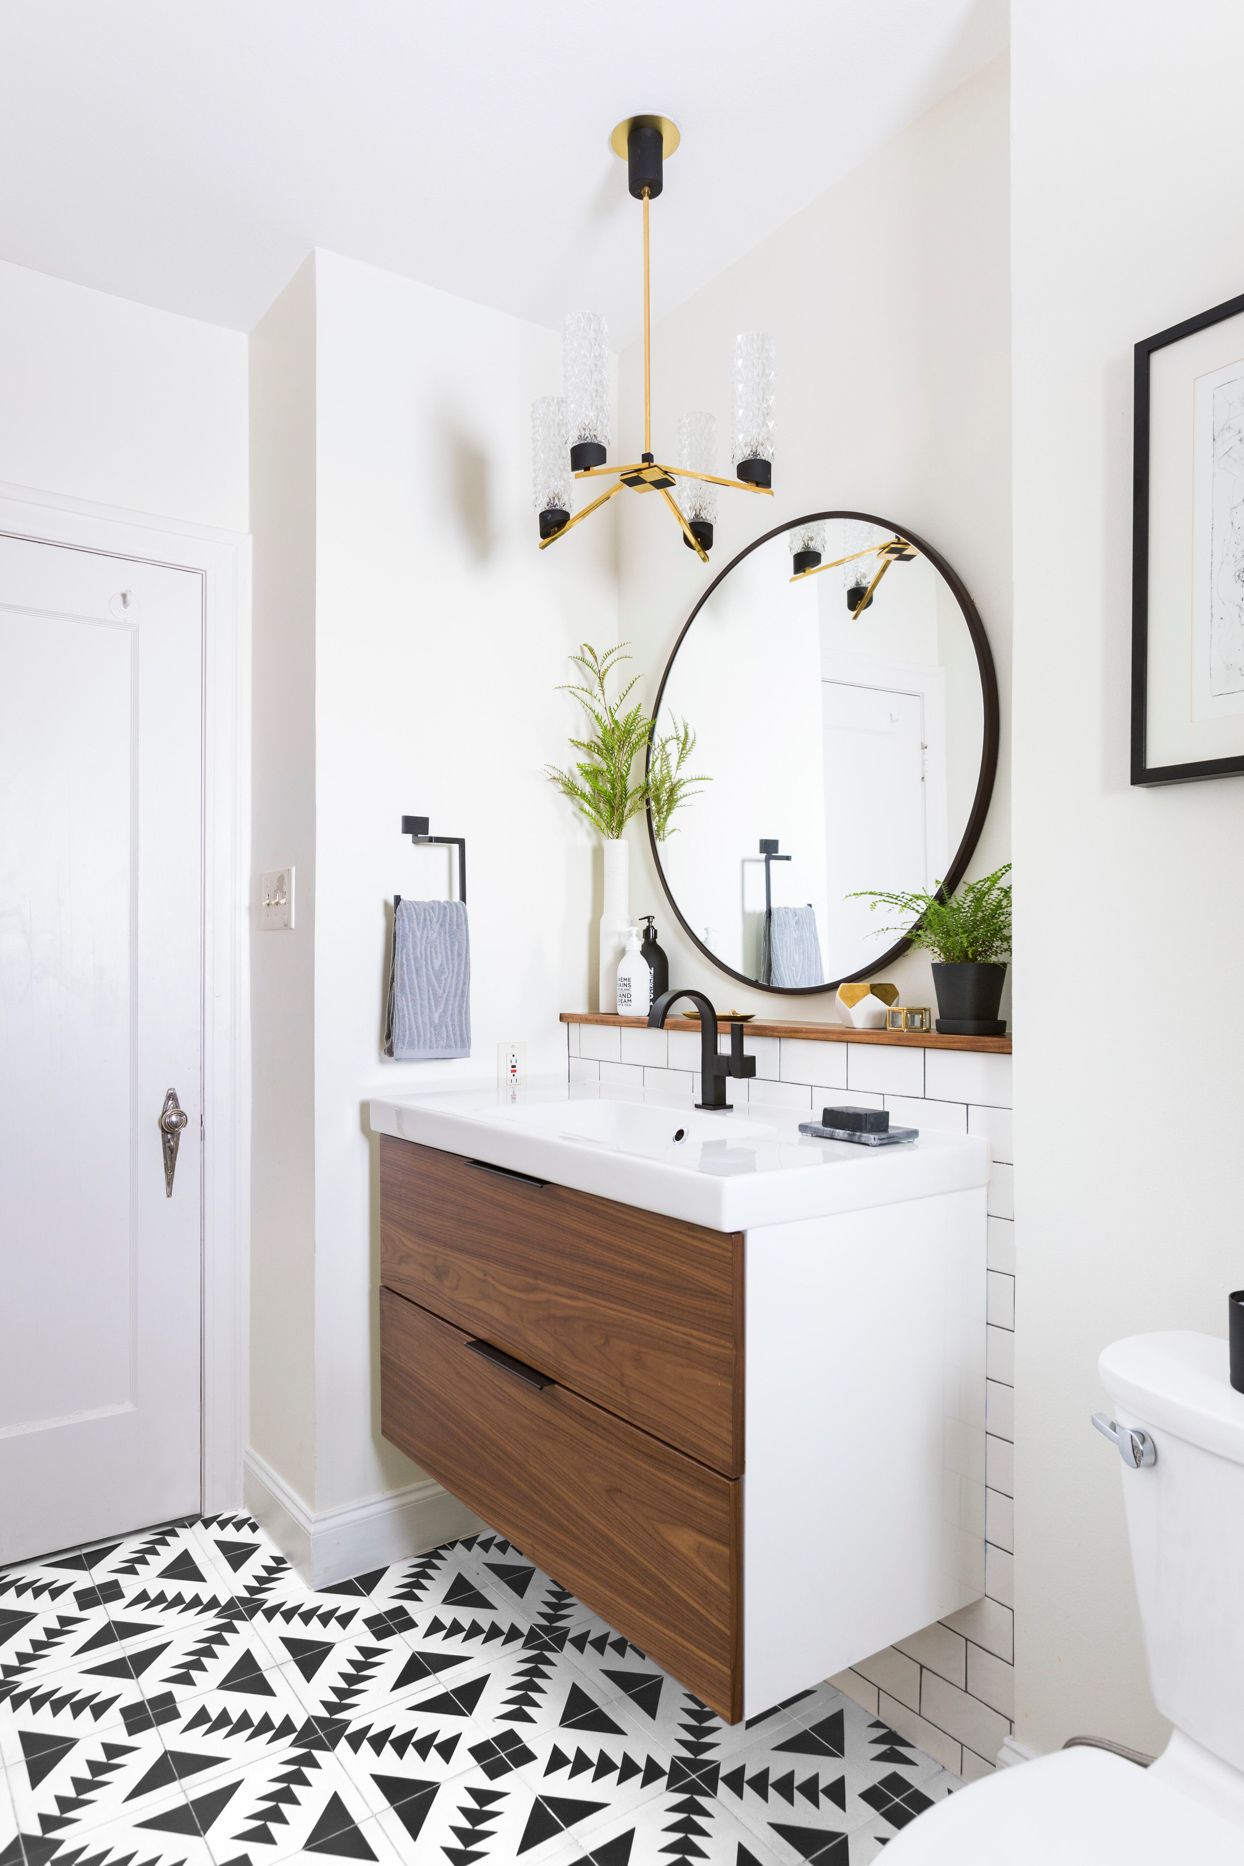
DIY Patterned Tile Floors
Update a blah bathroom with geometric floor tile for a modern farmhouse vibe. You can install new tile or upgrade current tile floors with a DIY stencil. First, scrub floors with a grease-cutting cleaner and mask off baseboards with painters tape. Prime tile using a bonding primer, then coat floors with a flat-sheen base color. Spray the back of your stencil with a low-tack adhesive and let it dry. This will help keep the stencil in place as you center it on each tile and apply paint with a foam roller or stencil brush. When all tiles have been stenciled and are dry, apply a water-base clear coat for protection.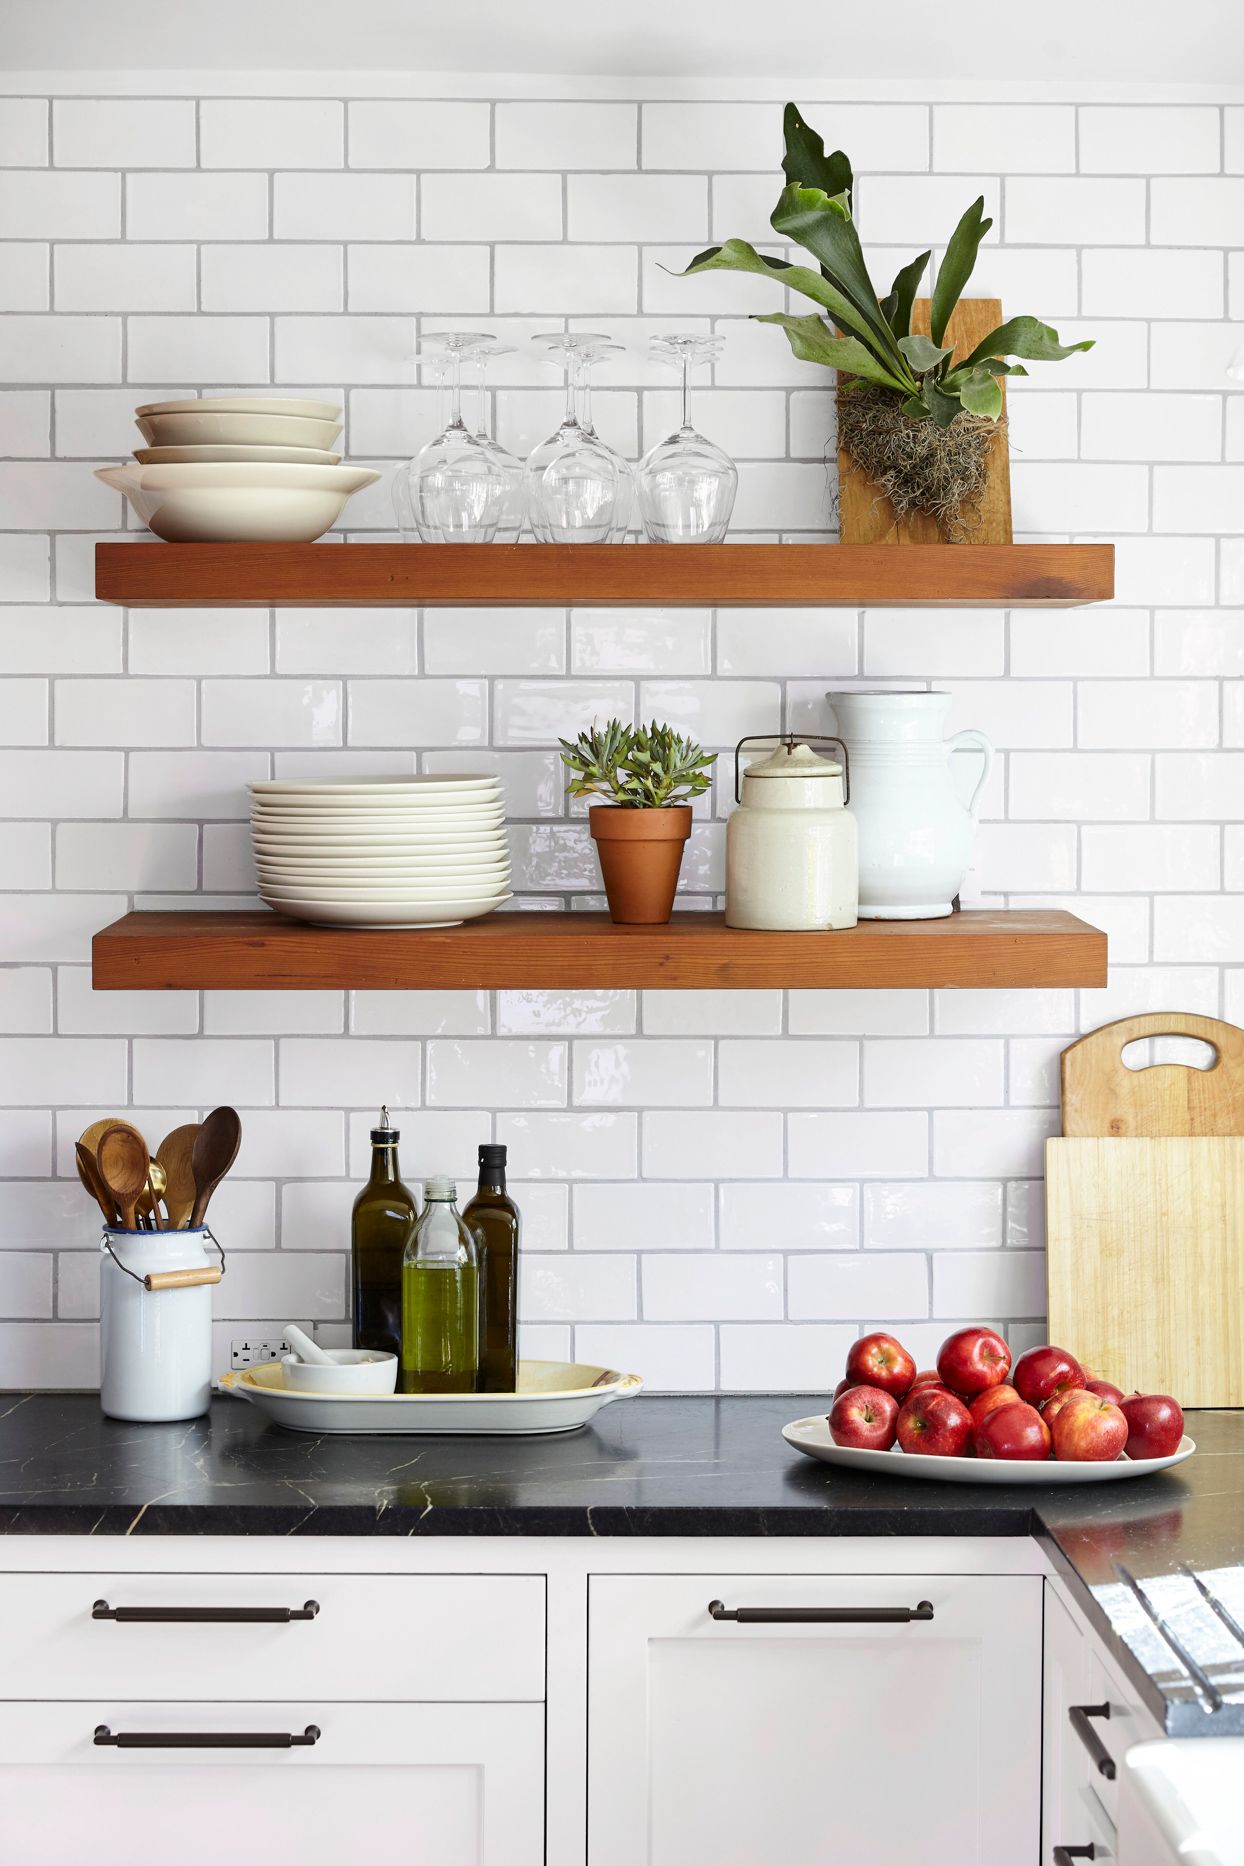
Easy Subway Tile Backsplash
Installing a backsplash can be tricky, but it's easier with sheets of mosaic tile, which relieve newbie DIYers from spacing, leveling, and adhering tile one by one. A good premixed grout makes the job even simpler. For most projects, a sanded grout, which is cost-effective and offers a tight seal, will work well. For glass tile, choose unsanded grout, which won't scratch delicate surfaces.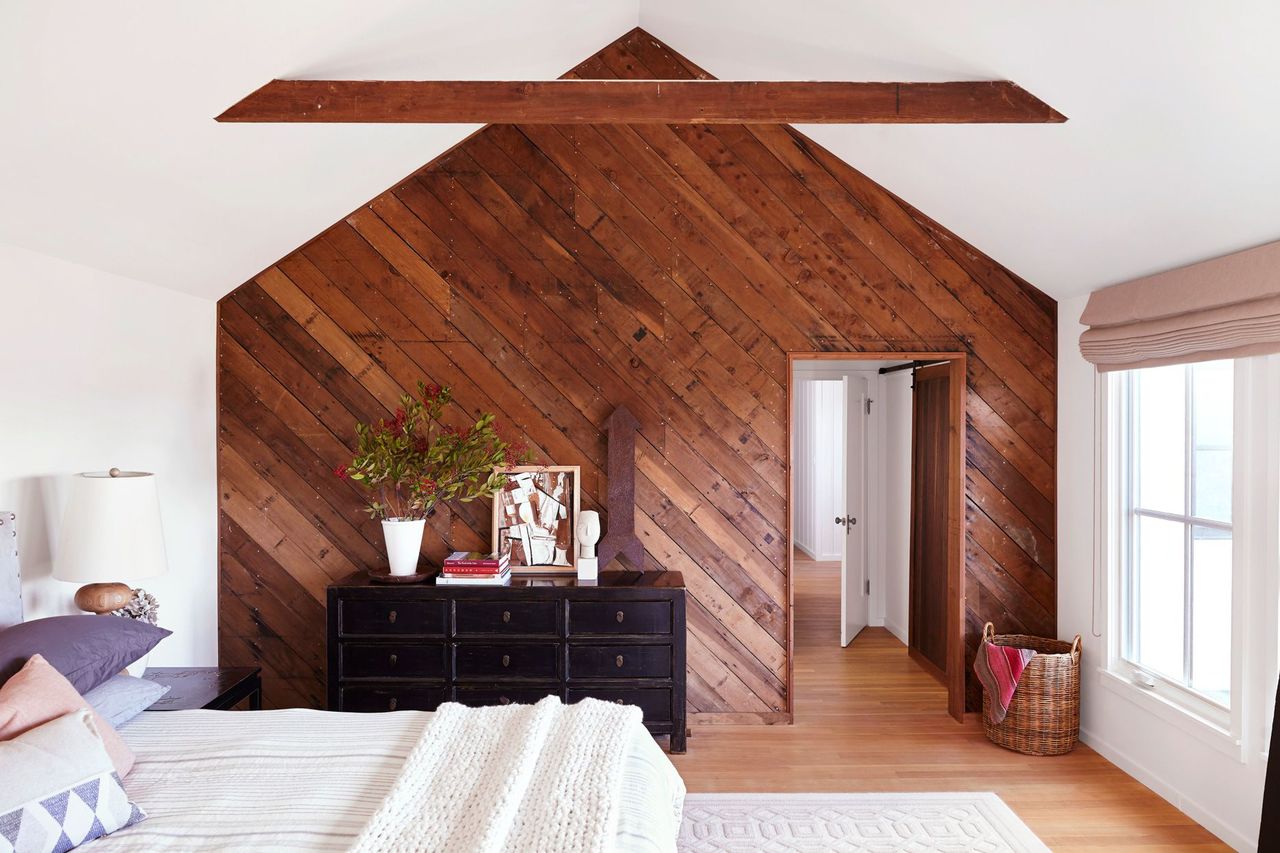
DIY Reclaimed Wood Ideas
To get the look of reclaimed wood without sourcing it yourself, try these aging techniques. Look for budget-friendly lumberyard planks (like pine or hemlock) with built-in character, such as marks, knots, and cracks. Hammer more dents, round edges with a sander, and tap finish nail in small groupings to mimic insect damage. Drop a frayed piece of steel wood into a spray bottle of vinegar and let it sit overnight. Spray the wood with the solution, and let dry for a gray barnwood effect. You can also mist planks with water, then apply a stain; the wood will take on the stain inconsistently, giving it a weathered look.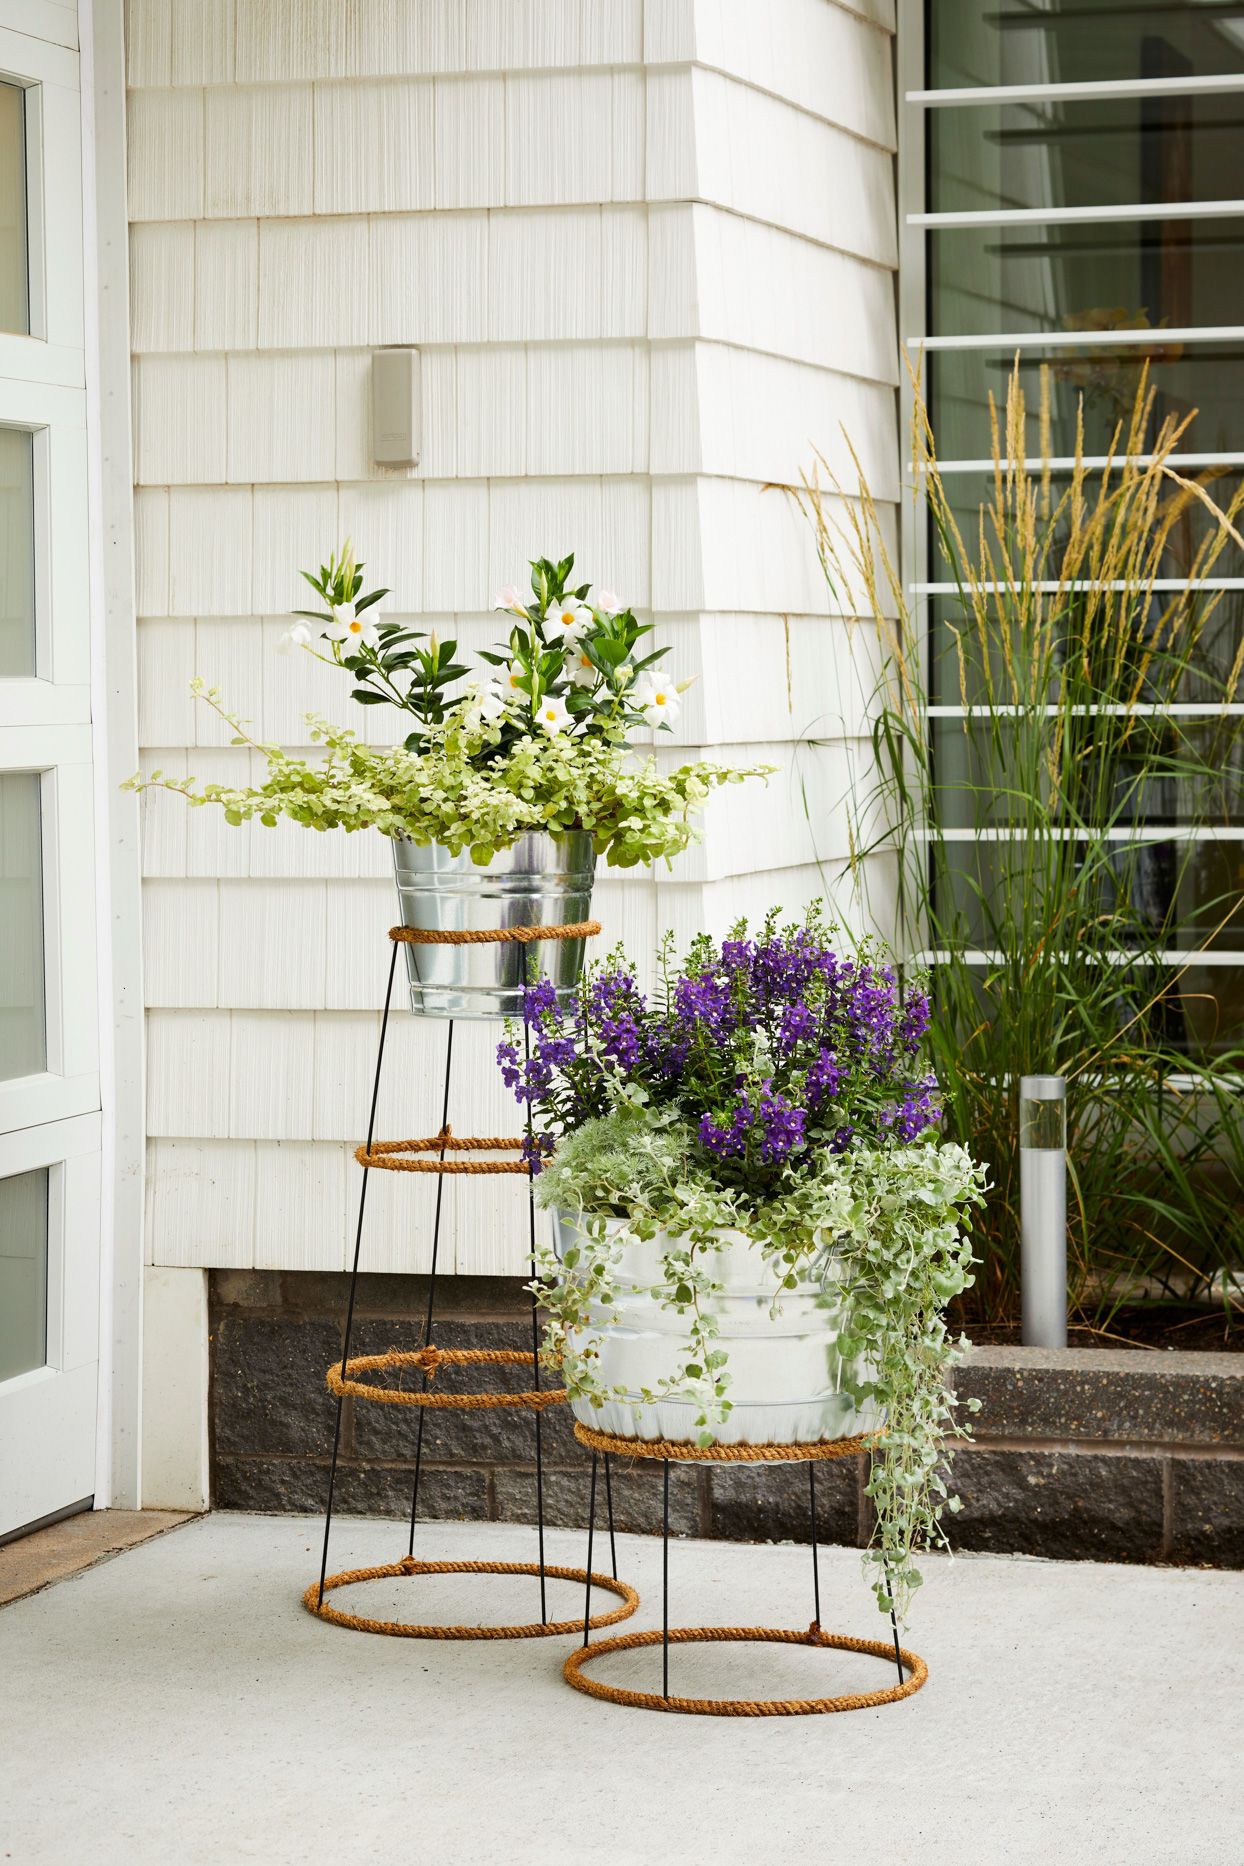
DIY Farmhouse Plant Stands
Turn simple tomato cages into charming greeters. Invest in those made from heavy-gauge wire that can support the weight of containers loaded with dirt, plants, and water. Use wire cutters to remove the legs and trim the cages to desired heights. Spray the cages with bonding primer and paint; let dry. For a charming touch, unfurl three-strand manila rope to wrap around the horizontal rings. Secure the rope ends with a knot or silicone glue. Small-tapered planters sit securely in tall stands, while large, wide-base planters are best reserved for short ones.


![A Tranquil Jungle House That Incorporates Japanese Ethos [Video]](https://asean2.ainewslabs.com/images/22/08/b-2ennetkmmnn_t.jpg)


